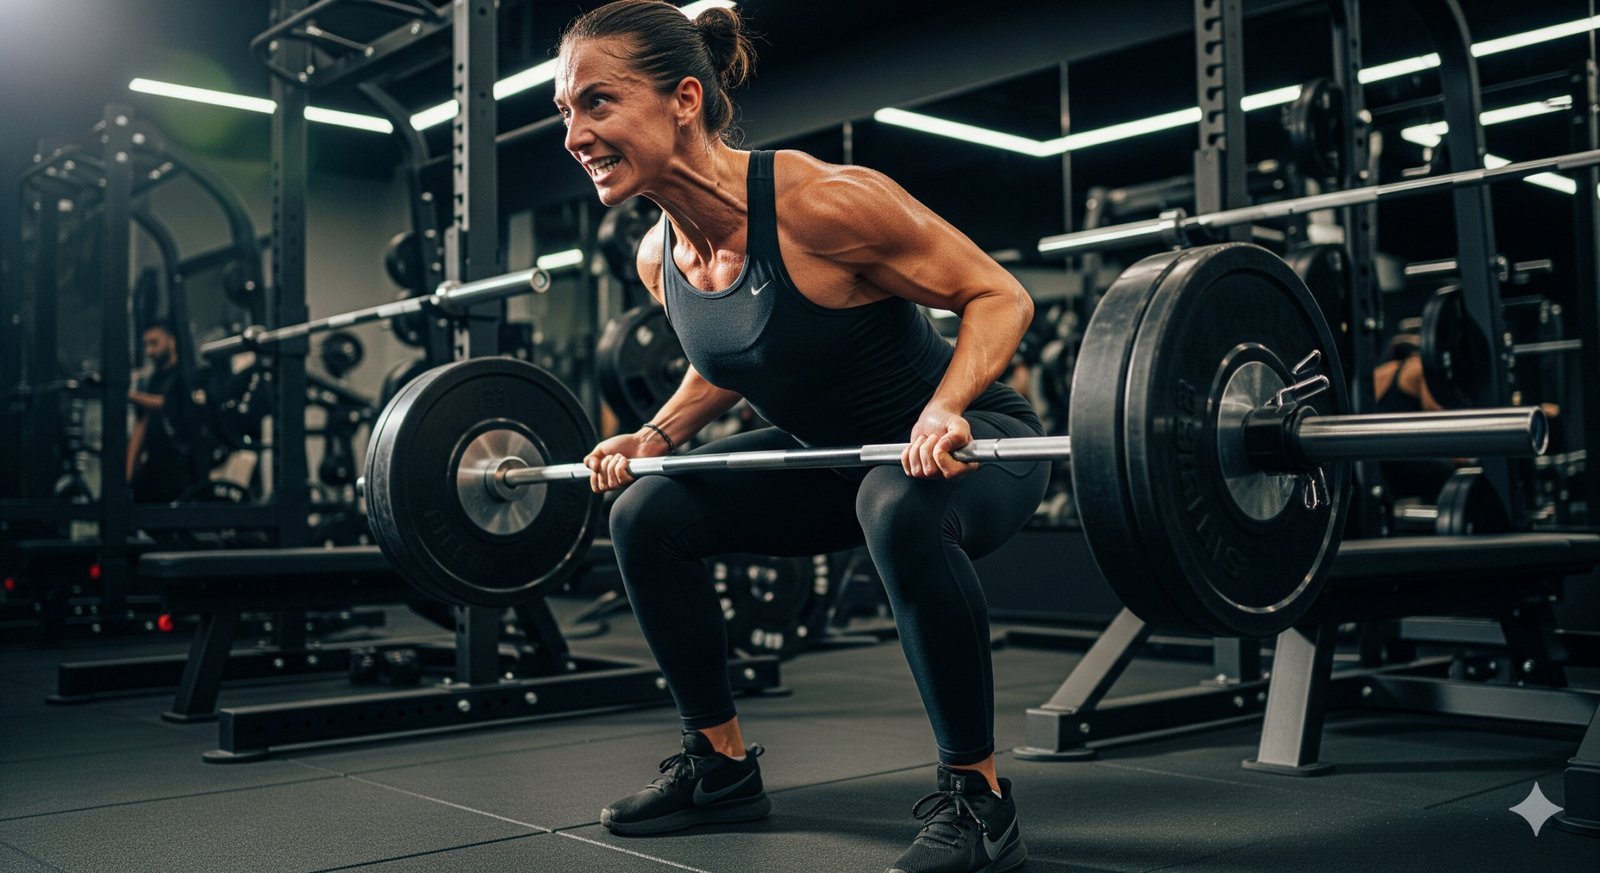
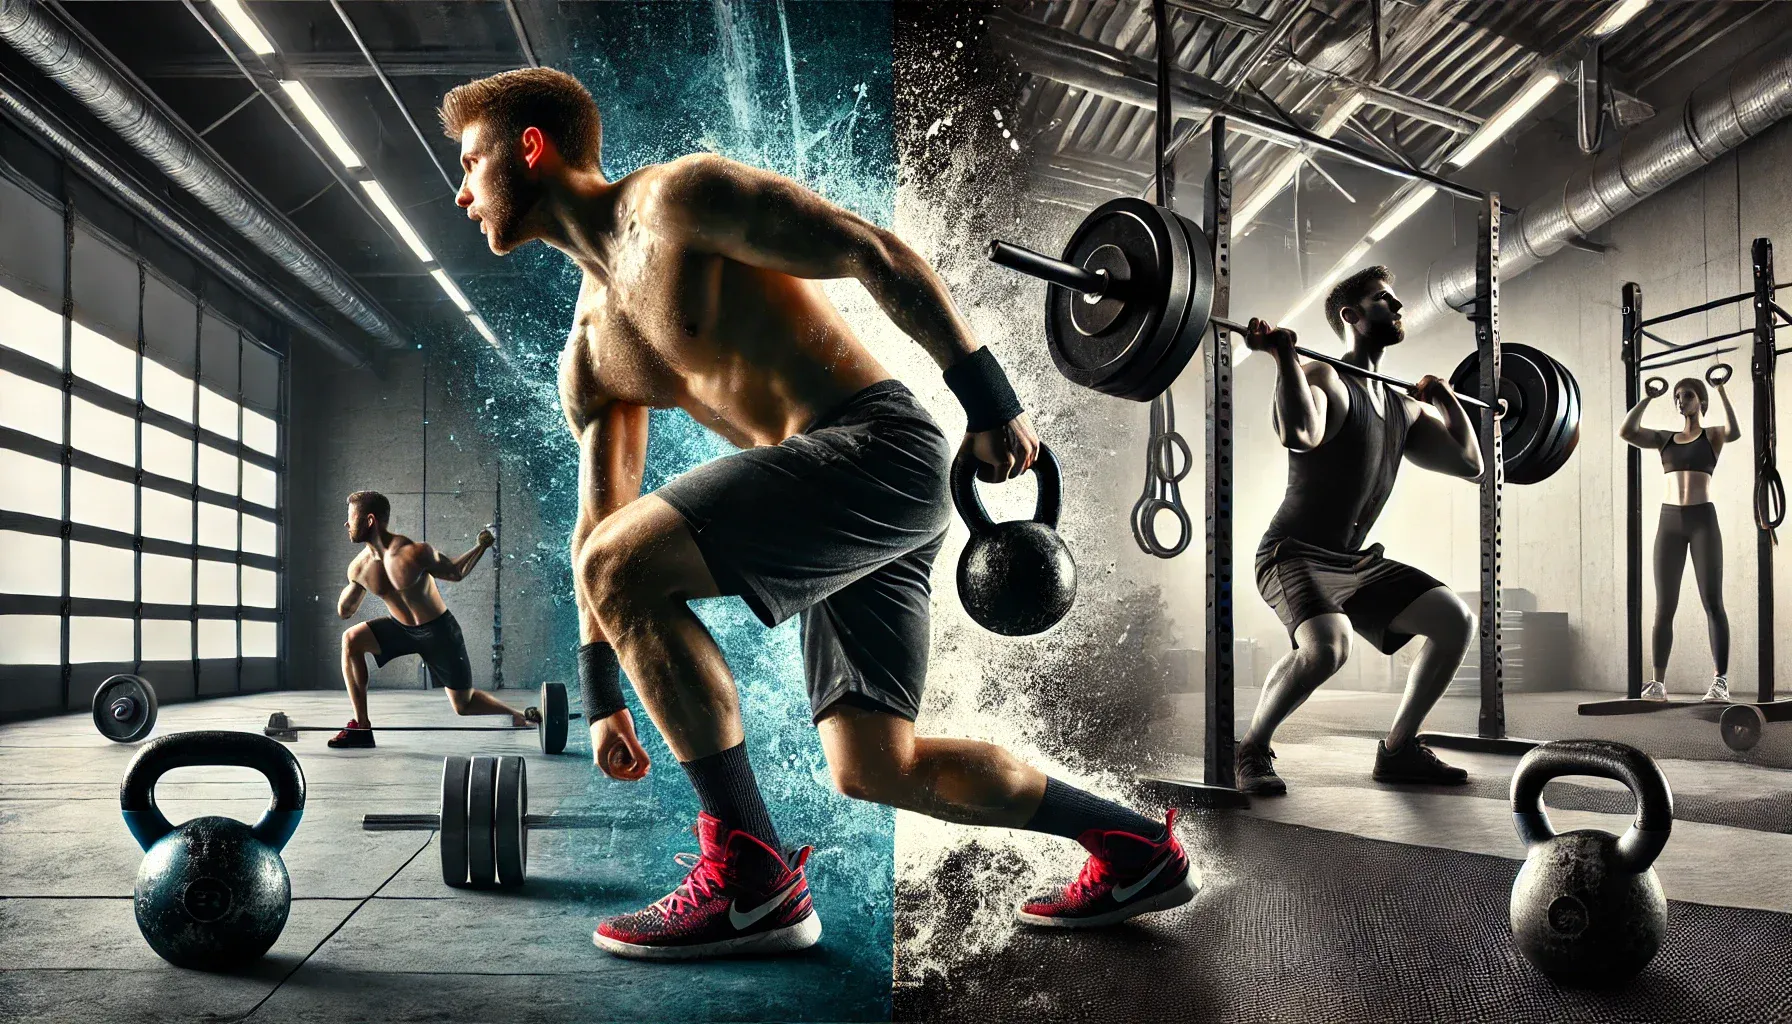
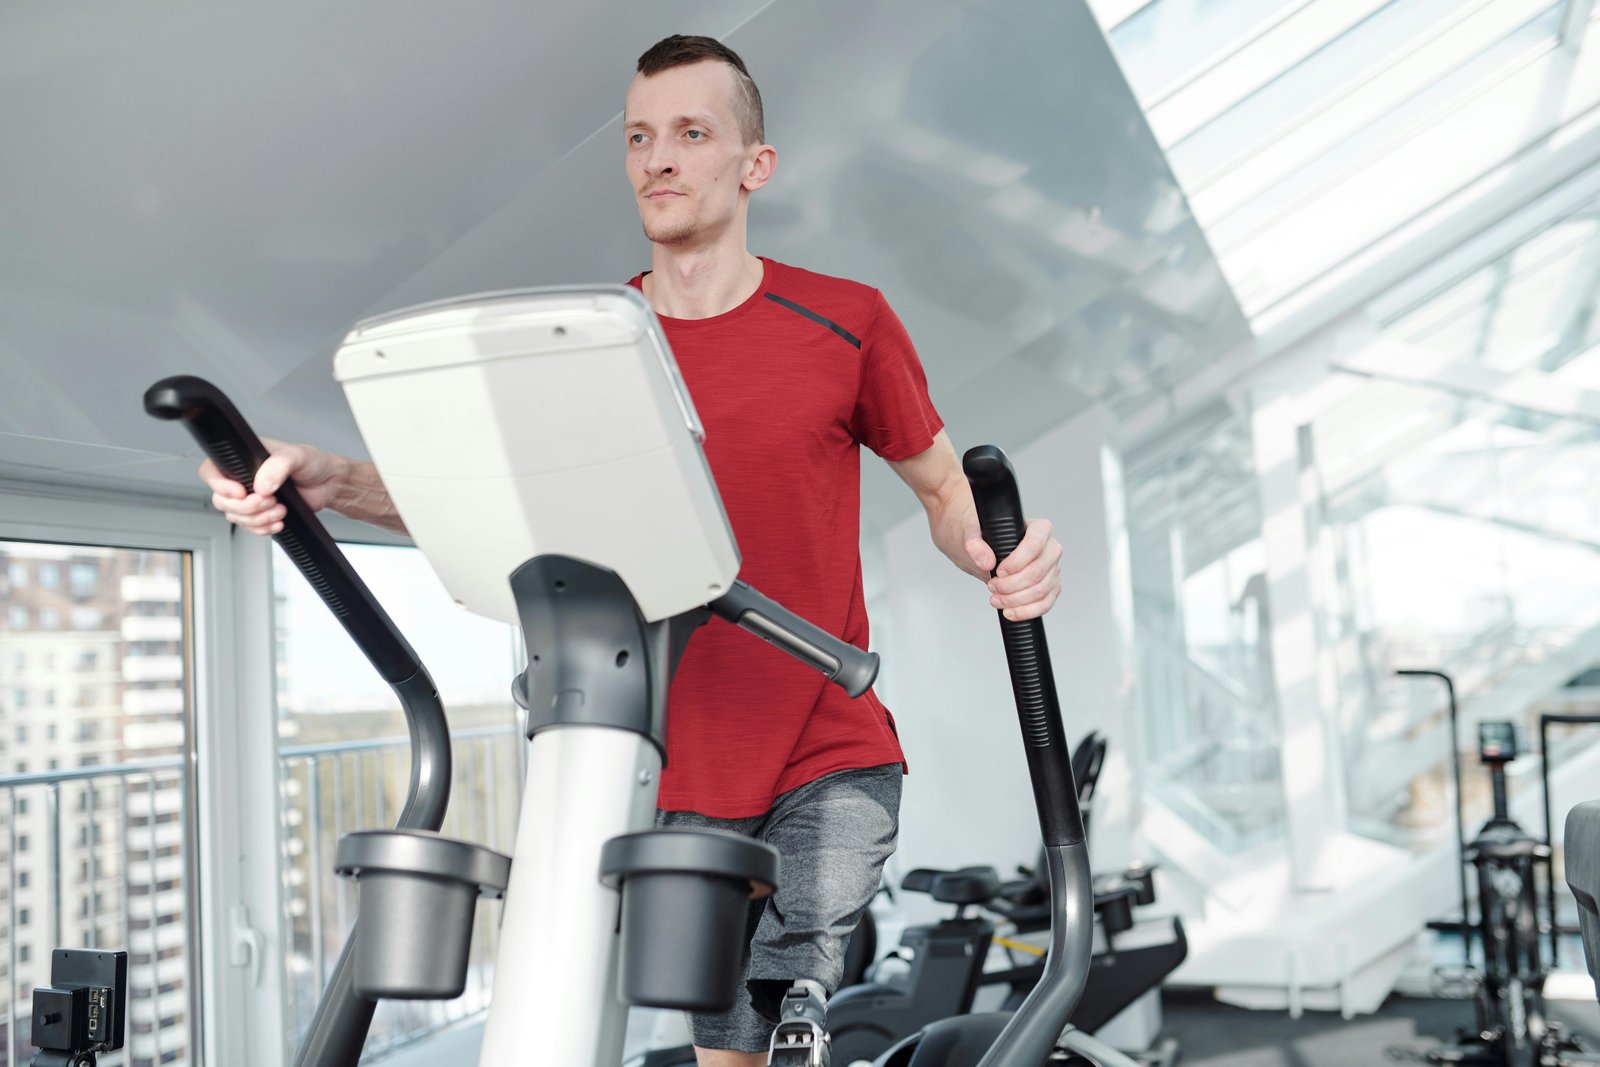
For years, we’ve been told the same story: if you want to lose weight, you need to pound the pavement, sweat it out on an elliptical, or spend hours on a treadmill. The mantra was “cardio is king.” And while cardio certainly has its place, the real secret weapon that’s been hiding in plain sight is strength training for fat loss.
This isn’t about getting massive and bulky; it’s about transforming your body’s engine into a fat-burning machine. If you’ve ever felt stuck on a cardio-only plateau, or if you’re a complete beginner who’s intimidated by the weight room, this is your starting point inside a complete weight loss guide that prioritizes muscle preservation, metabolism, and long-term fat loss.
Why Strength Training for Fat Loss Works Differently
Thinking of your body as a car, cardio is like burning fuel while you’re driving. It’s effective in the moment, burning calories as you move. Strength training for fat loss, however, is like upgrading your engine to be more efficient all the time. Here’s how it flips the script on traditional weight loss.
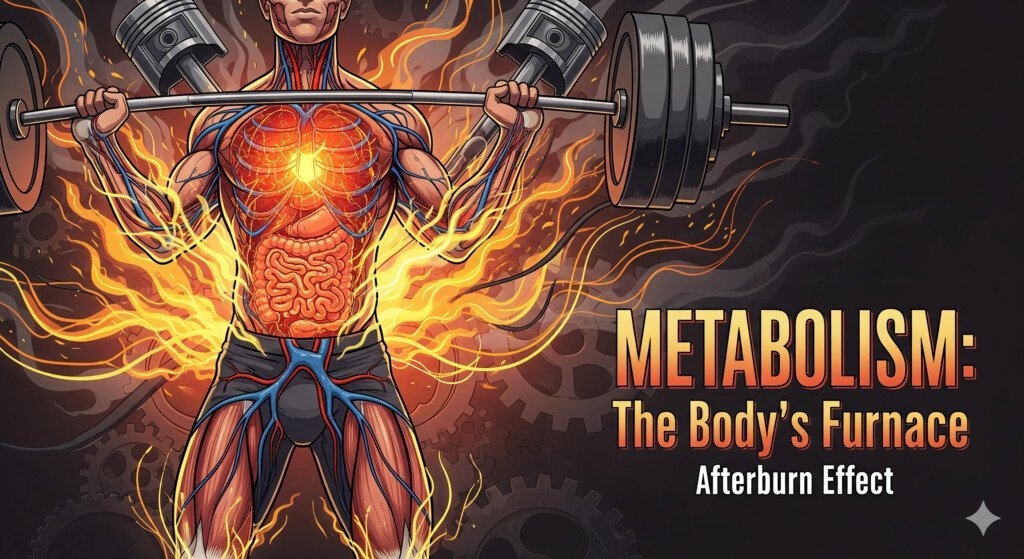
The Afterburn Effect (EPOC): This is the biggest reason why lifting weights is so effective. When you perform intense resistance training, your body uses a huge amount of energy to repair and rebuild the muscle fibers you’ve challenged. This process, known as Excess Post-exercise Oxygen Consumption (EPOC), keeps your metabolism elevated and burning calories for hours and even days after you’ve left the gym.
More Muscle, More Metabolism: Muscle tissue is metabolically active, which means it burns calories at rest, unlike fat tissue. The more muscle you have, the higher your resting metabolic rate (RMR) will be. By building muscle through strength training for fat loss, you’re essentially increasing the baseline number of calories your body burns every single day, even when you’re sleeping on the couch.
Improved Body Composition: While a scale might not show a huge drop overnight (because muscle is denser than fat), what you’ll notice is a significant change in your body shape. Your clothes will fit differently, your waist will slim down, and you’ll look and feel leaner. This is the true goal of a fitness journey not just weight loss, but fat loss.
Debunking the Myth: Does Lifting Burn Fat?
This is one of the most common questions out there, and the answer is both “yes” and “no.” During a lifting session, your body primarily uses stored carbohydrates (glycogen) for energy, not fat directly. The true magic happens after the workout.
As we discussed, the EPOC effect turns your body into a metabolic furnace. The energy needed to repair muscle damage comes from a variety of sources, including fat stores. So, while you might not be directly burning fat during your squats, you’re creating the conditions for your body to torch it for the next 24-48 hours. This is the fundamental difference between strength training for fat loss and cardio. Cardio burns fat during the session; lifting burns fat for long after.
Strength vs Cardio Weight Loss: A Friendly Competition
It’s not about choosing one over the other; it’s about understanding how they work together, especially when comparing cardio vs strength training for weight loss in a structured fat-loss plan. If you’re looking for quick calorie burn and immediate results on the scale, cardio has a slight edge. An hour on a bike can burn hundreds of calories. However, if your goal is sustainable, long-term fat loss and a complete body transformation, strength training for fat loss wins by a landslide.
Think of it this way:
Cardio: Great for heart health, endurance, and burning calories while you’re doing it.
Strength Training: Builds muscle, boosts metabolism, reshapes your body, and burns fat around the clock.
The most effective strategy combines both. Start with strength training to deplete your glycogen stores and create a powerful metabolic stimulus, then finish with a short burst of high-intensity cardio (like a 10-15 minute HIIT session) to tap into fat reserves.
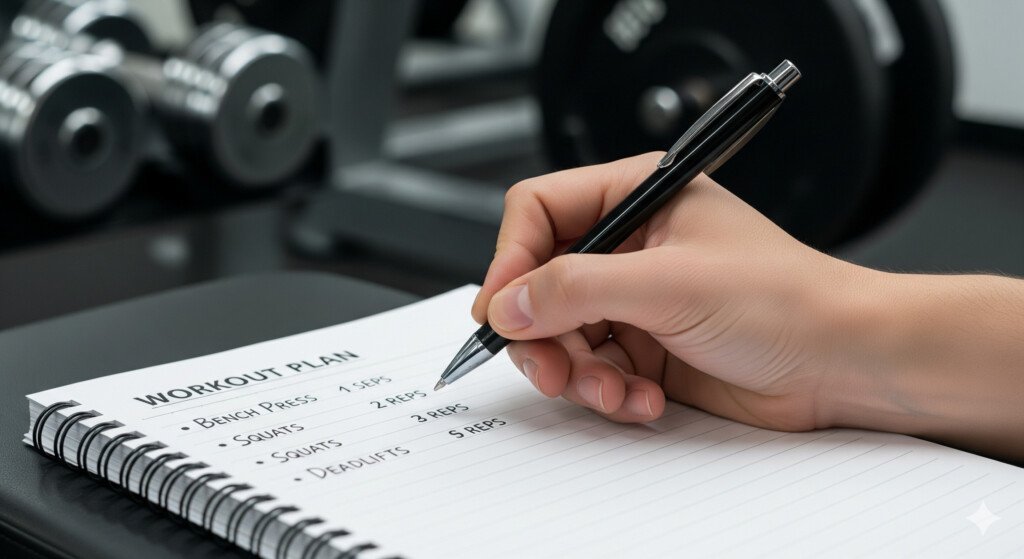
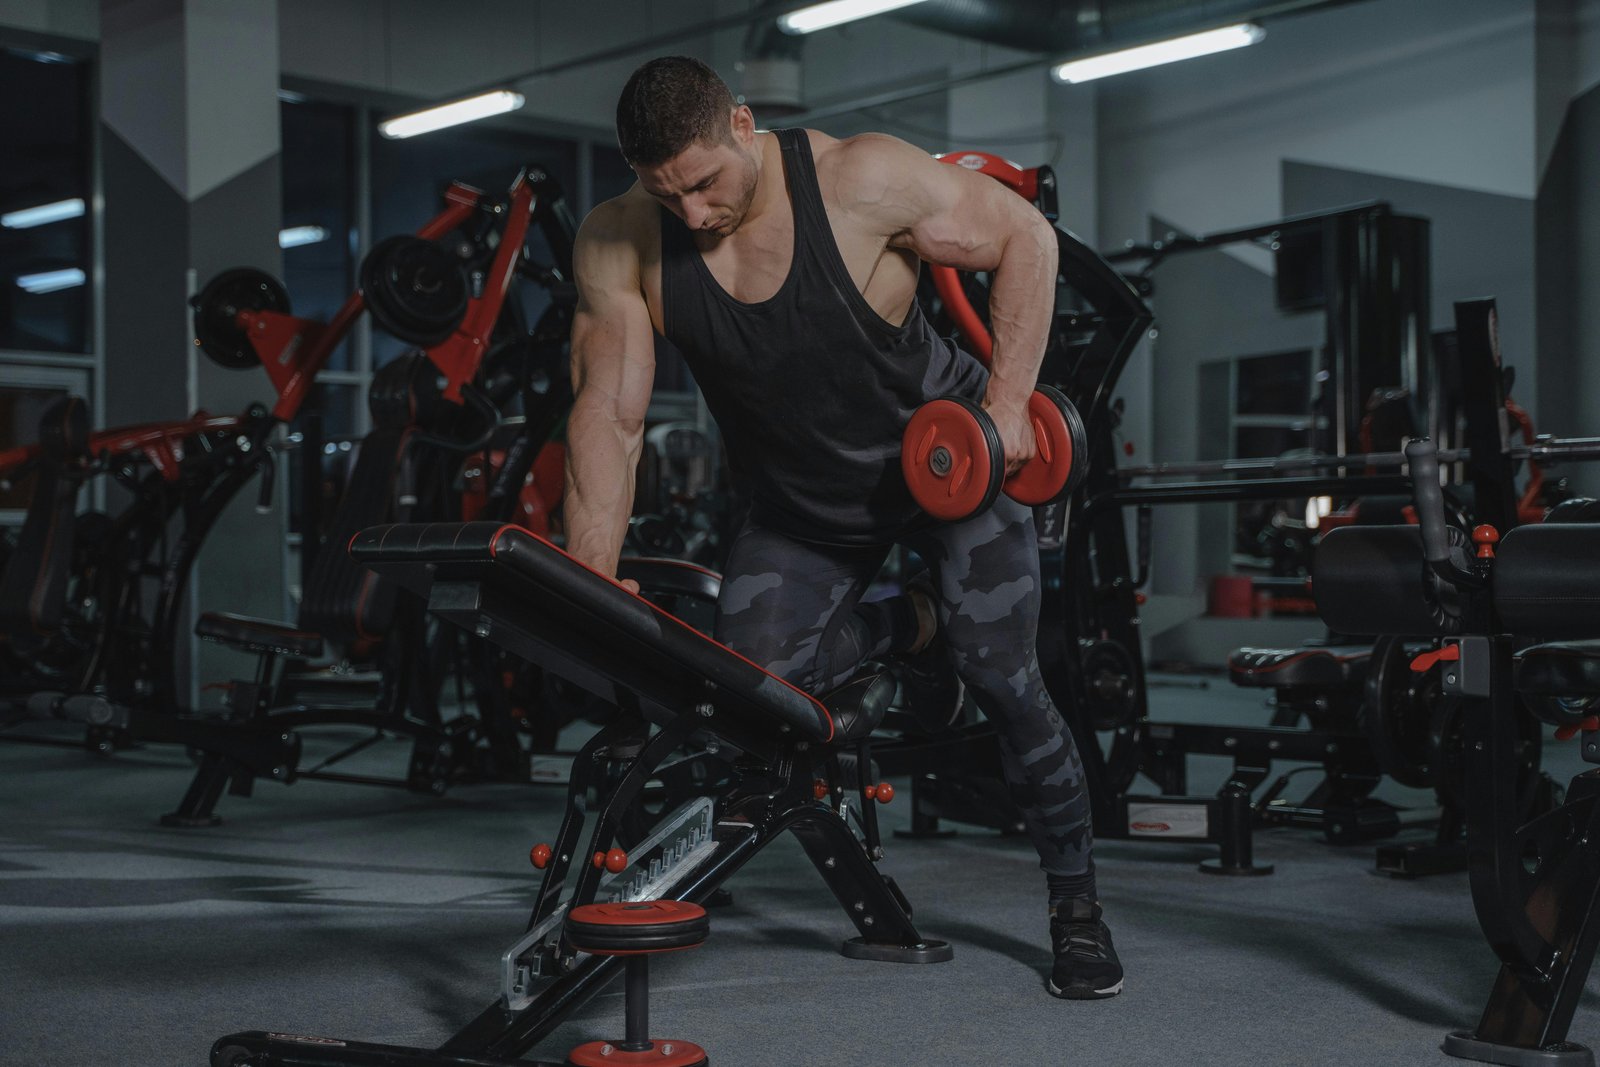
Creating a Smart Strength Training Plan for Weight Loss
A successful program isn’t about aimlessly wandering around the gym; it’s about a structured, progressive plan. A solid strength training plan for weight loss should focus on compound movements, proper frequency, and smart progression.
1. Frequency: Aim for 3-4 days of lifting per week. This gives your body enough time to recover and rebuild muscle.
2. Compound Exercises: These are multi-joint movements that work several muscle groups at once. They burn the most calories and provide the biggest metabolic boost.
Lower Body: Squats, deadlifts, lunges, hip thrusts.
3. Reps and Sets: For fat loss and muscle retention, aim for 3-4 sets of 8-12 repetitions for each exercise. This is a sweet spot for building muscle without excessive fatigue.
4. Progressive Overload: The key to seeing results. You must constantly challenge your muscles by gradually increasing the weight, reps, or sets over time. If you’re not getting stronger, you’re not growing, and you’re not maximizing your fat loss potential.
For those looking to accelerate their results, a pre-workout supplement can be a valuable tool to help you push through plateaus and maintain focus during your lifts. Blended into your routine, it can provide the extra energy you need for those challenging sets.
A Beginner Strength Training Plan for Weight Loss
This sample routine is designed for anyone new to lifting, focusing on form and a full-body approach. Do this 3 times a week, with at least one rest day in between.
Warm-Up (5-10 minutes): Light cardio (jogging, jump rope) and dynamic stretches (arm circles, leg swings).
Workout (45-60 minutes):
Squats: 3 sets of 10-12 reps
Dumbbell Rows: 3 sets of 10-12 reps per arm
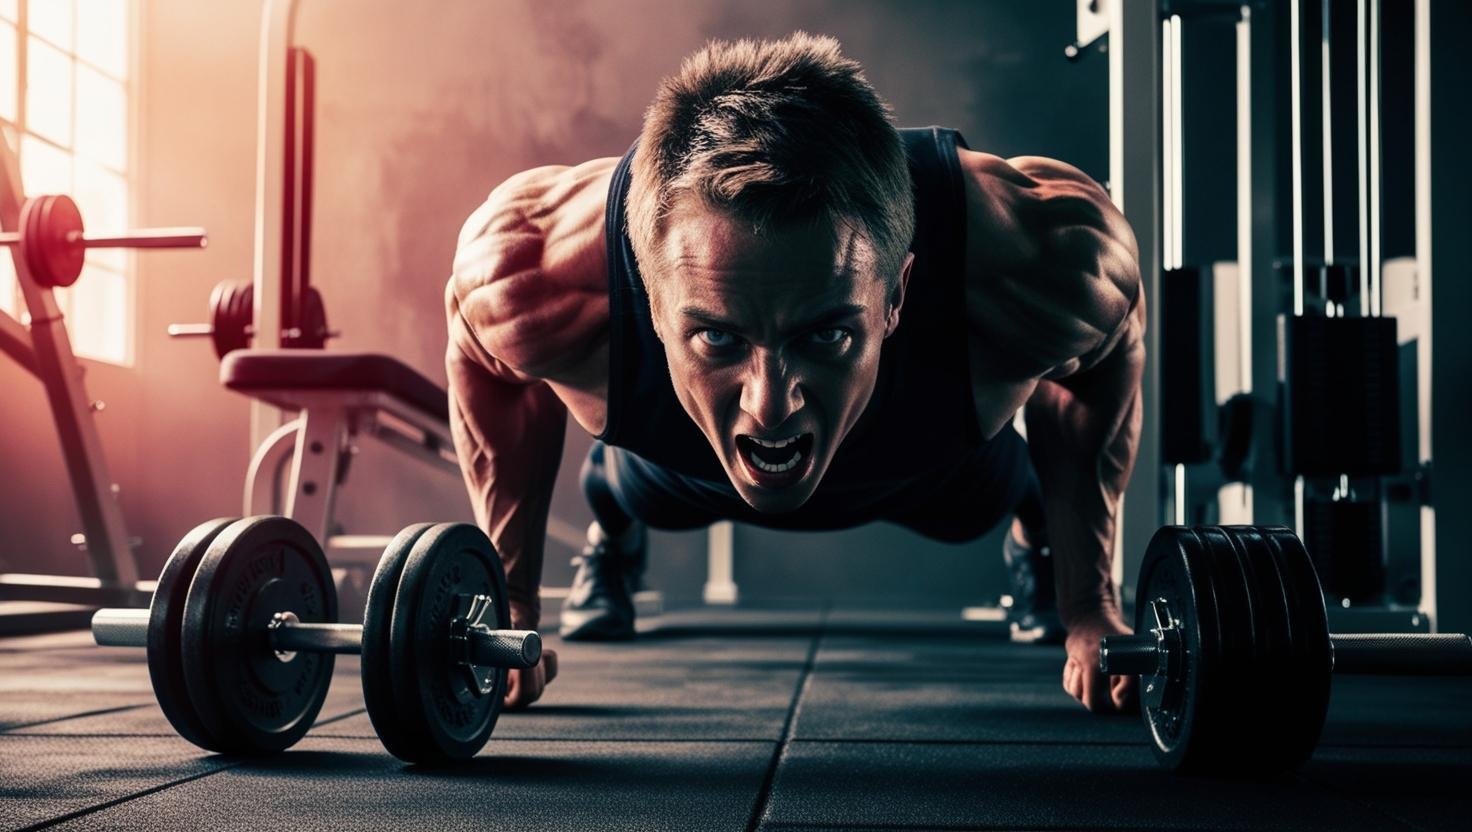
Push-ups (on knees or toes): 3 sets to failure
Overhead Press: 3 sets of 10-12 reps
Lunges: 3 sets of 10-12 reps per leg
Plank: 3 sets, hold for 30-60 seconds
As you get stronger, you’ll feel the need to use a slightly heavier weight. This is how you’ll continue to see results. Remember that consistency is more important than intensity when you’re just starting out.
Fueling Your Body for Resistance Training Fat Loss
Your workout is only half the battle. What you eat and how you recover are just as crucial for a successful resistance training fat loss journey.
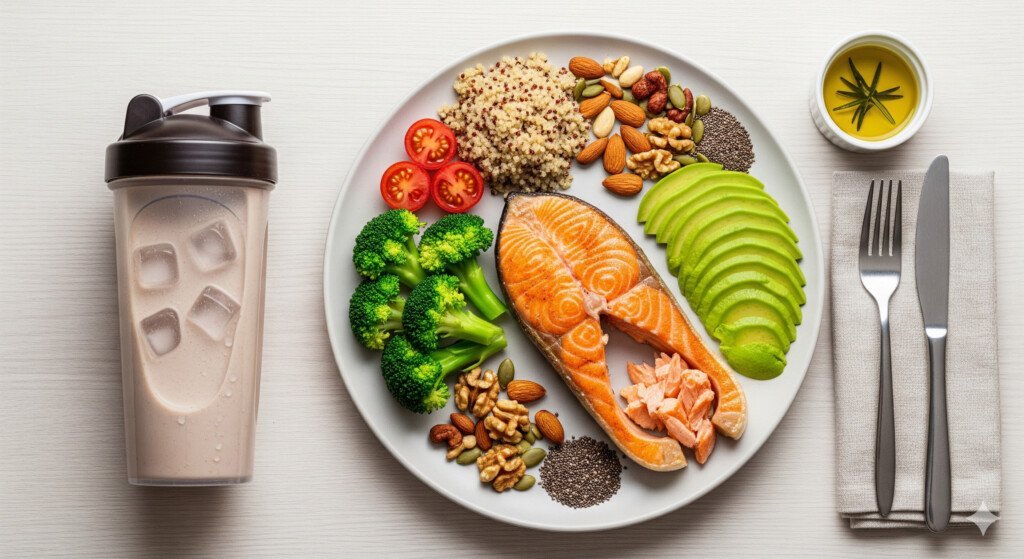
Protein is Your Best Friend: A high protein diet for fat loss is essential for repairing muscle tissue, preserving lean mass, and keeping you feeling full while in a calorie deficit. Aim for around 1 gram of protein per pound of body weight per day. A high-quality protein powder is an easy way to meet your daily needs, especially on busy days or immediately after a workout.
Carbs Aren’t the Enemy: Carbs provide the energy for your workouts. Focus on complex carbohydrates like oats, brown rice, and sweet potatoes, which provide sustained energy without a sugar crash.
Healthy Fats: Fats are crucial for hormone production and overall health. Think avocados, nuts, and olive oil.
Hydration: Water is a key player in metabolism and fat loss. Make sure you’re drinking plenty throughout the day.
The Calorie Deficit: At the end of the day, you must be in a calorie deficit to lose fat. This means you need to burn more calories than you consume. Strength training for fat loss makes this process so much easier by boosting your metabolic rate, allowing you to eat a little more while still losing weight.
Top Mistakes Beginners Make with Strength Training for Weight Loss
Ignoring Form: Lifting too heavy too soon without focusing on proper form can lead to injury and a less effective workout. Start with lighter weights and nail down your technique before you increase the load.
Not Eating Enough Protein: Without sufficient protein, your body can’t rebuild the muscle you’ve worked so hard for, which can stall your progress.
Obsessing Over the Scale: The scale can be misleading. As you build muscle and lose fat, your weight might not change much, but your body composition will be completely different. Take progress photos and measurements to track your real transformation.
Skipping Rest Days: Recovery is when muscle growth and repair happen. Pushing yourself every single day can lead to overtraining, burnout, and injury.
Neglecting Nutrition: You can’t out-train a bad diet. What you put into your body is the single most important factor for fat loss.
Conclusion
Moving beyond the myth that cardio is the only way to lose weight is a game-changer. The truth is, incorporating strength training for fat loss into your routine is the most sustainable, effective, and transformative way to achieve a leaner physique. It’s not just about what you do in the gym; it’s about building a body that burns calories efficiently all day long.
Start with a smart plan, focus on form, fuel your body with proper nutrition, and be consistent. You’ll not only shed fat, but you’ll feel stronger, more confident, and more capable than ever before.
Frequently Asked Questions (FAQ)
1: Will I get bulky from lifting weights? (Especially for women)
This is a very common concern, but the short answer is no. Women have significantly lower levels of testosterone compared to men, which is the primary hormone responsible for large muscle growth. Instead of getting bulky, you will develop a lean, toned, and strong physique. The bulky look comes from a combination of specific, high-volume training and a very high-calorie diet, which is not what you need for strength training for fat loss.
2: How often should I lift to lose fat?
A good starting point is 3-4 days per week. This provides enough stimulus to build and maintain muscle while allowing your body adequate time to recover. Spacing your lifting sessions with rest days or active recovery (like walking) is key.
3: Do I need to do cardio too?
While not strictly necessary for fat loss, combining cardio and strength training for fat loss is a highly effective strategy. Cardio improves heart health and endurance, and when used strategically (like a short HIIT session after lifting), it can enhance fat burning.
4: What’s the best time to lift for fat loss?
The best time to lift is whenever you can be consistent. Whether it’s in the morning, during your lunch break, or after work, the key is to find a time that works for your schedule so you can stick with it long-term.
5: How long until I see results?
You can expect to start feeling a difference in your energy levels and strength within the first 2-4 weeks. Visible body composition changes typically become noticeable around the 6-8 week mark, especially if you’re consistent with both your training and nutrition. Remember to take progress photos and measurements to track your journey, as the scale may not tell the full story.
Disclaimer:
This post may contain affiliate links. If you purchase through them, we may earn a small commission at no extra cost to you. Also, this content is for informational purposes only and does not substitute professional medical advice.
Underrated gym machines can dramatically improve strength, muscle growth, and injury prevention when used correctly. Many gym users focus only on popular equipment while ignoring powerful machines that deliver excellent results. Learning how to use underrated gym machines effectively can unlock new strength gains and improve overall workout performance.
Discover 10 powerful ways to get the most out of underrated gym machines. Boost muscle gains, prevent injury, and sculpt your physique using smarter strength strategies. If you want to understand how different training tools fit together for strength, fat loss, and performance, this complete fitness equipment guide explains how to choose the right equipment for your training goals.
1: Discover the Landmine Attachment
The landmine attachment is one of the most underrated yet effective tools in strength training. Despite its versatility, it often goes unnoticed in gyms, overshadowed by barbells, dumbbells, and cable machines. However, once you learn how to use it, the landmine can elevate your workouts and help you build strength, stability, and power. Looking to upgrade your home gym?
Why the Landmine Attachment Is Overlooked?
Many gym-goers skip the landmine attachment simply because they:
Aren’t Familiar With It: Unlike barbells or machines, the landmine isn’t commonly taught in beginner workouts.
Don’t Know How to Use It Effectively: Without proper guidance, people may not realize its full potential.
Think It’s Less Effective Than Free Weights: While free weights are great, the landmine offers unique benefits that can complement any routine.
If you’ve never used a landmine before, now’s the time to give it a try!
Benefits of the Landmine Attachment
1. Core Engagement
The landmine forces your core to stabilize during every movement, making it an excellent tool for building core strength. Whether you’re doing presses, rows, or rotational exercises, your abs, obliques, and lower back all work together to keep you balanced.
2. Joint-Friendly Training
Unlike barbells and dumbbells, the landmine moves through a fixed arc of motion. This reduces stress on your:
Shoulders: Great for pressing movements without the strain of overhead barbell lifts.
Elbows and Wrists: The neutral grip positions are more comfortable than traditional barbell exercises.
Knees and Lower Back: The angled movement pattern makes squatting and lunging easier on the joints.
3. Versatility for Strength and Conditioning
The landmine is one of the most versatile attachments in the gym. It allows you to perform:
Presses: Landmine shoulder presses are a great alternative to overhead barbell presses.
Rows: Bent-over landmine rows strengthen your upper back.
Squats and Lunges: Landmine squats and lunges provide lower-body strength without heavy spinal loading.
Rotational Movements: Landmine twists and Russian twists improve core stability and power.
Suggestion: Looking to upgrade your home gym? The Rogue Landmine Attachment is a durable and space-saving option for landmine training.
Recommendation: Check out the Landmine Attachment for a durable and affordable option. Supplement Pairing: Pair your landmine workouts with Standard Whey to support muscle recovery and growth.
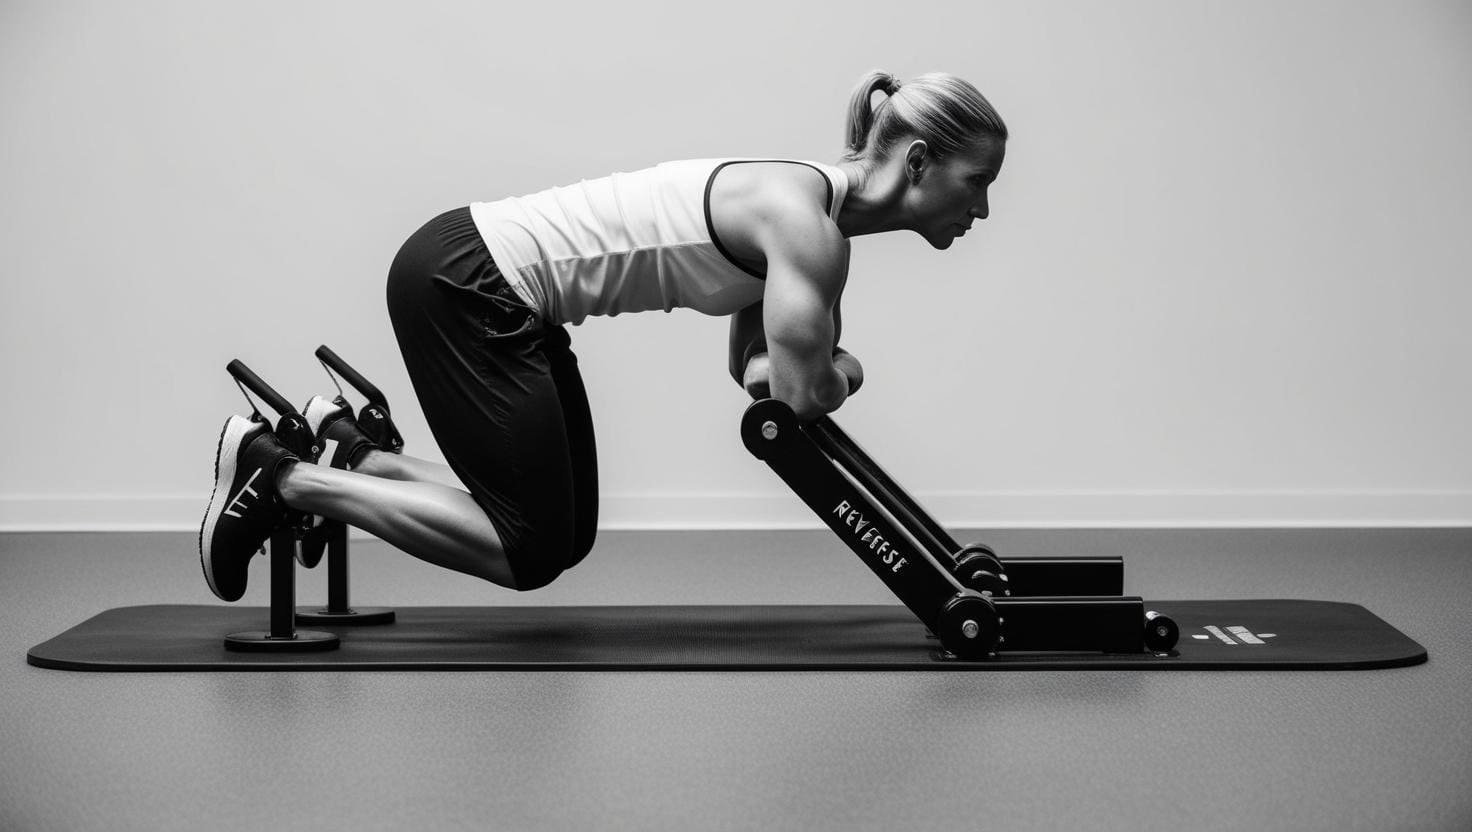
2: Master the Reverse Hyperextension Machine
The reverse hyperextension machine is one of the most underrated pieces of gym equipment. While commonly used in rehab settings and powerlifting gyms, it deserves a place in any fitness routine. Whether you’re recovering from an injury, strengthening your posterior chain, or looking for a safer way to train your lower back, this machine is a game-changer.
Why the Reverse Hyperextension Machine Is Overlooked
Many gym-goers avoid the reverse hyperextension machine because they:
Think It’s Only for Athletes or Rehab Patients: While it’s great for injury recovery, it’s also a powerful tool for strength building.
Don’t Know How to Use It Properly: Without proper guidance, people may not realize its full benefits.
Underestimate Its Effectiveness: Since it’s not a traditional squat or deadlift movement, some assume it’s not as useful for lower-body training.
However, this machine can be the missing piece in your training routine for stronger glutes, hamstrings, and a healthier spine.
Benefits of the Reverse Hyperextension Machine
1. Spinal Decompression
Unlike traditional lower-back exercises like deadlifts or back extensions, the reverse hyperextension gently decompresses the spine. This makes it an excellent option for:
Relieving lower back pain
Improving spinal mobility
Preventing injuries caused by spinal compression from heavy lifting
2. Superior Glute and Hamstring Activation
Few exercises target the glutes and hamstrings as effectively as the reverse hyperextension. The movement allows for full hip extension, ensuring maximum muscle engagement. This helps with:
Building stronger, more powerful glutes
Developing well-balanced hamstrings
Improving athletic performance in running, jumping, and lifting
3. Injury Prevention and Rehab
By strengthening the entire posterior chain (lower back, glutes, and hamstrings), the reverse hyperextension reduces the risk of injuries. It’s especially beneficial for:
Athletes who need explosive power and stability
Lifters recovering from lower back injuries
Anyone looking to improve posture and prevent back pain
Suggestion: If you’re looking to add this to your home gym, the Rogue Reverse Hyper is a top-rated option for durability and performance.
How to Use the Reverse Hyperextension Machine Properly
Try This
Start with Light Weight: Focus on controlled reps before adding resistance.
Maintain a Neutral Spine: Avoid excessive swinging or arching.
Squeeze Your Glutes at the Top: Pause at the peak for maximum muscle activation.
Perform 3–4 Sets of 10–15 Reps: Ideal for both strength and endurance training.
Recommendation: The Reverse Hyper is a premium choice for serious lifters.
Supplement Pairing: Use Creatine Monohydrate to boost strength and power during your reverse hyperextension workouts.
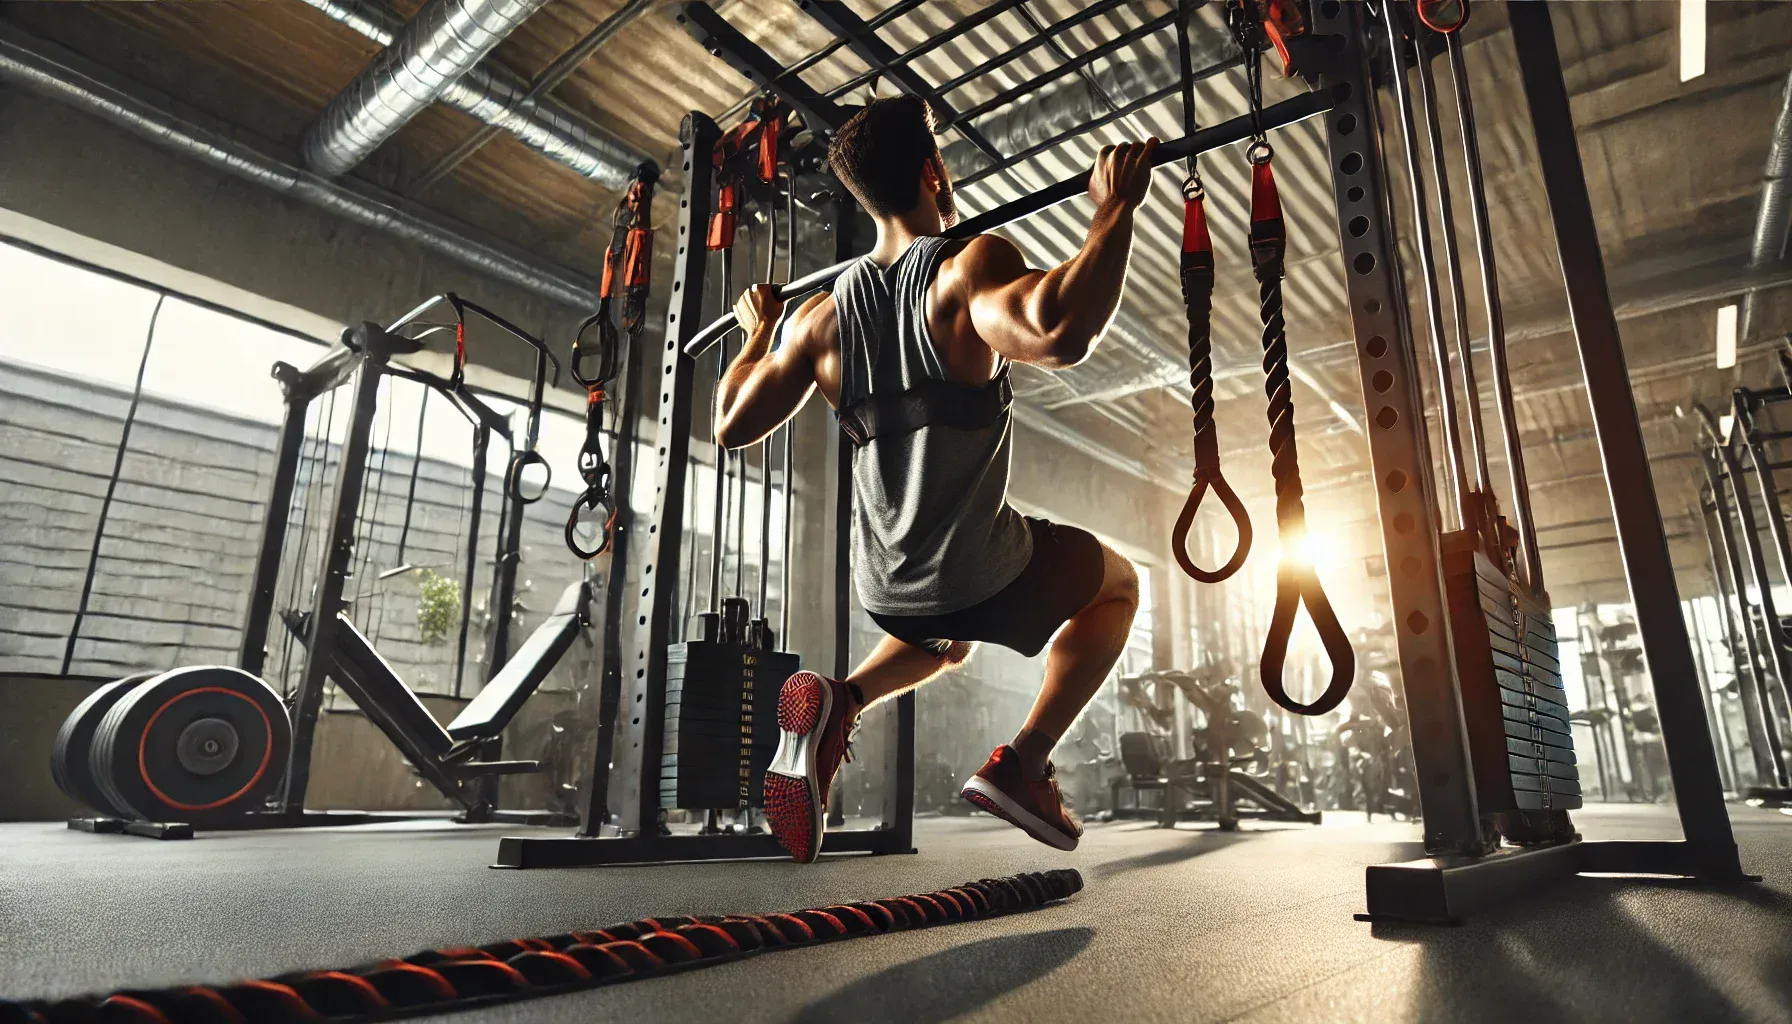
3: Conquer the Assisted Pull-Up/Dip Machine
The assisted pull-up/dip machine is an underrated powerhouse for upper-body strength training. While some gym-goers shy away from it, thinking it’s only for beginners, this machine can benefit everyone from complete novices to experienced lifters looking to refine their form and increase reps.
Why the Assisted Pull-Up/Dip Machine Is Overlooked?
Many people avoid this machine due to:
Feeling Intimidated by Pull-Ups and Dips: Some assume they need to be strong enough for unassisted versions before using the machine.
Thinking It’s Only for Beginners: While it helps beginners build strength, advanced lifters can use it to improve endurance and refine technique.
Underestimating Its Effectiveness: Some believe bodyweight or weighted pull-ups and dips are the only way to progress, but this machine provides a structured way to build up to those exercises.
In reality, this machine is a fantastic tool for developing upper-body strength, improving form, and progressing toward unassisted movements.
Benefits of the Assisted Pull-Up/Dip Machine
1. Accessible for All Fitness Levels
The machine allows you to adjust the level of assistance, making it a great option for both beginners and advanced lifters.
Beginners: Start with higher assistance to build strength and confidence.
Intermediate Lifters: Reduce assistance over time to gradually transition to bodyweight pull-ups and dips.
Advanced Lifters: Use minimal assistance for high-rep sets or perfect your technique.
2. Builds a Strong Upper Body
Both pull-ups and dips target multiple muscle groups, making them some of the most effective upper-body exercises:
Pull-Ups: Strengthen the back, biceps, and shoulders.
Dips: Target the chest, triceps, and shoulders.
By using this machine, you can work on both exercises in a controlled manner, improving muscle activation and overall strength.
3. Core Engagement and Stability
Pull-ups and dips require a strong core to maintain proper form. Using the assisted machine still engages your core, helping you develop better stability and control.
4. Reduces Injury Risk
For those who struggle with strict pull-ups or dips, attempting them without proper strength or form can lead to injuries. The assisted machine provides support, allowing you to build strength safely and gradually.
Suggestion: The Pull-Up/Dip Station is a solid option for home gyms, offering durability and smooth assistance adjustment.
How to Use the Assisted Pull-Up/Dip Machine for Maximum Gains
Try This Progression Plan:
Start with Higher Assistance (50–70% of body weight)
Gradually Reduce Assistance (decrease by 5–10 lbs every few weeks)
Increase Reps and Time Under Tension (slow, controlled movements)
Transition to Unassisted Reps (mix in band-assisted or eccentric pull-ups)
Aim for 3–4 sets of 8–12 reps for both pull-ups and dips, adjusting assistance as needed.
Recommendation: The Power Rack includes an assisted pull-up/dip station. Supplement Pairing: Fuel your pull-up and dip sessions with BCAAs to reduce muscle soreness and support recovery.
4: Dominate the Glute-Ham Developer (GHD)
The Glute-Ham Developer (GHD) is one of the most underutilized yet powerful machines in the gym. While it’s often associated with elite athletes and CrossFit enthusiasts, the GHD is beneficial for anyone looking to build lower-body strength, improve core stability, and prevent injuries.
Why the GHD Is Overlooked?
Many gym-goers avoid the GHD because:
It Looks Intimidating: The setup and movement mechanics can be confusing for beginners.
It’s Seen as an Advanced Tool: While it’s popular in powerlifting, Olympic lifting, and CrossFit, people often think it’s only for high-level athletes.
Lack of Awareness: Some simply don’t know the benefits of training on the GHD.
However, once you learn how to use it properly, the GHD becomes an essential tool for developing lower-body strength and core stability.
Benefits of the Glute-Ham Developer
1. Builds Posterior Chain Power
The GHD targets key posterior chain muscles:
Glutes – Essential for hip extension and lower-body power.
Hamstrings – Strengthened in both knee flexion and hip extension, improving athletic performance.
Lower Back – Helps reinforce spinal stability and strength for compound lifts like squats and deadlifts.
Stronger posterior chain muscles lead to better performance in lifts, sprints, and sports while reducing injury risk.
2. Develops Core Strength
GHD sit-ups are far more challenging than traditional crunches or hanging leg raises. The extended range of motion forces your core to work harder, improving strength and endurance.
3. Prevents Injuries
Weak hamstrings and glutes are common culprits behind knee pain, lower back issues, and hamstring strains. The GHD helps strengthen these muscles, reducing injury risk and improving overall stability.
4. Enhances Sprint Speed and Jump Power
Athletes and fitness enthusiasts who want to improve explosiveness will benefit from GHD training. Stronger glutes and hamstrings translate to faster sprints, higher jumps, and more powerful movements.
Suggestion: The GHD Machine is a high-quality option for home or gym use, offering excellent durability and adjustability.
How to Use the GHD for Maximum Gains?
Try These Exercises
Glute-Ham Raises – Strengthen your hamstrings and improve knee flexion control.
Back Extensions – Target your lower back and glutes while reinforcing spinal stability.
GHD Sit-Ups – Engage your entire core with an extended range of motion for better ab strength.
Progression Plan
Beginner: Start with partial-range back extensions and assisted glute-ham raises.
Intermediate: Perform full-range glute-ham raises and controlled sit-ups.
Advanced: Add resistance (weight plate or banded tension) for increased difficulty.
Aim for 3–4 sets of 8–12 reps for each exercise, gradually increasing difficulty over time.
Recommendation: The GHD is a top-tier option for serious athletes. Supplement Pairing: Take PreSeries Bulk before your GHD workouts for enhanced energy and focus.
5: Push and Pull with the Sled
The sled is one of the most effective yet underrated pieces of gym equipment. While it’s commonly associated with athletes and sports performance training, the sled is an incredible tool for anyone looking to build strength, power, and endurance. Whether you’re training for muscle growth, fat loss, or overall fitness, sled work can elevate your workouts.
Why the Sled Is Overlooked?
Many gym-goers don’t use the sled because:
It’s Seen as an Advanced Tool: People assume it’s only for athletes or hardcore trainers.
Lack of Knowledge: Many don’t realize the sled’s versatility for both strength and cardio.
No Complex Programming Needed: Since sled training doesn’t require intricate techniques, some overlook its effectiveness.
But once you incorporate sled training into your routine, you’ll see why it’s a game-changer.
Benefits of Sled Training
1. Full-Body Workout
Sled pushes and pulls engage multiple muscle groups in one movement, including:
Legs – Quadriceps, hamstrings, glutes, and calves all work together.
Core – Stabilization is required to maintain posture and control.
Upper Body – When pulling the sled or using a rope, your back, shoulders, and arms get involved.
2. Low-Impact Training
Unlike running, sled work is easy on the joints while still being highly effective for improving endurance and power. This makes it an excellent option for individuals with knee, ankle, or hip issues who still want to train explosively.
3. Improves Strength & Power
Sled training builds functional strength that translates to real-world movements, such as sprinting, jumping, and lifting. Whether you’re training for sports or general fitness, sled work enhances lower-body power without excessive wear and tear.
4. Enhances Conditioning Without Running
If you hate running but want to improve cardiovascular fitness, sled pushes and pulls are a great alternative. They provide an intense cardio workout without the repetitive impact of jogging or sprinting.
5. Versatile for Any Training Goal
For Strength: Load the sled with heavy weight and push or pull for short, explosive sets.
For Fat Loss & Conditioning: Use lighter weights and push or drag the sled for longer distances with minimal rest.
For Speed & Agility: Sprint with an unloaded or lightly loaded sled to improve acceleration.
Suggestion: The Sled is an excellent, adjustable-resistance sled for home and gym use.
How to Use the Sled for Maximum Gains
Try These Sled Exercises:
Sled Pushes (Heavy & Light Variations) – Drive through your legs to build lower-body power and endurance.
Sled Pulls (Backward & Forward) – Strengthen your quads, hamstrings, and grip.
Rope Pulls – Use a battle rope or strap for an upper-body and grip challenge.
Lateral Drags – Improve side-to-side movement strength, ideal for athletes and injury prevention.
Recommendation: The Sled is a durable and versatile choice. Supplement Pairing: Replenish your energy post-sled workout with Standard Whey
6: Explore the Functional Trainer (Dual Cable Machine)
The functional trainer, also known as the dual cable machine, is one of the most versatile pieces of gym equipment. Many strength programs combine cable training with other lean muscle gym machines to maximize muscle activation and improve long term fat burning results. While many gym-goers use it for basic cable exercises, they often overlook its full potential. This powerhouse machine allows for an endless variety of movements, making it a staple for strength training, rehabilitation, and functional fitness.
Why the Functional Trainer Is Overlooked?
Despite being a staple in many gyms, the functional trainer is often underutilized because:
Lack of Awareness – Many people don’t realize how many exercises can be performed with this machine.
Preference for Free Weights – Traditional dumbbells and barbells dominate strength training, overshadowing the benefits of cables.
Complex Adjustments – Some users find it tricky to adjust the pulleys, so they avoid using it.
However, once you understand its benefits, the functional trainer can become your go-to machine for full-body workouts.
Benefits of the Functional Trainer
1. Unlimited Exercise Variety
The functional trainer allows you to perform hundreds of exercises, including:
Upper Body – Cable chest flys, rows, lat pulldowns, shoulder presses
Lower Body – Cable squats, lunges, glute kickbacks
Whether you’re a beginner or advanced lifter, the dual cables let you customize resistance and movement patterns to fit your needs.
2. Constant Tension for Maximum Muscle Activation
Unlike free weights, which rely on gravity, cables provide consistent resistance throughout the entire range of motion. This helps maximize muscle engagement, especially during isolation exercises like bicep curls and triceps pushdowns.
3. Joint-Friendly Resistance
Because the cables allow for smooth, controlled movements, they put less stress on the joints compared to barbells or dumbbells. This makes the functional trainer an excellent option for people recovering from injuries or those looking to prevent joint strain.
4. Space-Saving Design for Home Gyms
For those building a home gym, a functional trainer can replace multiple machines like a lat pulldown, pec deck, and smith machine. It’s a compact, all-in-one solution for strength training.
Suggestion: The Functional Trainer is a top-rated choice for home and commercial gyms.
Best Functional Trainer Exercises
Upper Body
Cable Chest Flys – Targets the chest with constant tension for better muscle activation.
Single-Arm Cable Rows – Improves back strength and muscular imbalances.
Overhead Shoulder Press – Strengthens shoulders while minimizing joint stress.
Lower Body
Cable Squats – Adds resistance while allowing for a controlled movement pattern.
Glute Kickbacks – A great way to isolate and activate the glutes.
Cable Lateral Lunges – Engages the legs and core with a side-to-side motion.
Core & Functional Strength
Woodchoppers – Builds rotational strength and works the obliques.
Pallof Press – A top exercise for core stability and anti-rotation strength.
Resisted Side Steps – Strengthens the hips and improves mobility.
Recommendation: The Home Gym is an excellent all-in-one option. Supplement Pairing: Use Omega to support joint health and reduce inflammation.
7: Crush It with the Vertical Leg Press
The vertical leg press is an underrated yet highly effective lower-body exercise machine. Unlike the standard leg press, which has you pressing forward or at a 45-degree angle, the vertical version has you pressing straight up against gravity. This unique positioning shifts more emphasis onto the quads and glutes while minimizing strain on the lower back.
Why the Vertical Leg Press Is Overlooked?
Despite its effectiveness, the vertical leg press isn’t as commonly used in gyms due to:
Less Availability – Many gyms don’t have this machine, as the traditional leg press is more popular.
Intimidation Factor – The idea of pressing weight straight up can seem daunting to beginners.
Unfamiliar Setup – Some gym-goers aren’t sure how to get into the machine or safely load/unload weight.
However, once you learn how to use it properly, the vertical leg press can be a game-changer for leg gains.
Benefits of the Vertical Leg Press
1. Greater Quad Activation
The vertical angle places more tension on the quads, helping build stronger, more defined legs compared to traditional leg presses or squats.
2. Reduced Lower Back Strain
Unlike the standard leg press, the vertical version keeps your spine in a neutral position, reducing compression on the lower back. This makes it an excellent alternative for those with back issues.
3. Stronger Glute and Hamstring Engagement
Because of the vertical push motion, your glutes and hamstrings also get an intense workout, making it a great tool for posterior chain development.
4. Compact and Space-Saving
Many home gym enthusiasts prefer the vertical leg press because it takes up less space than a traditional leg press machine, making it a great option for smaller setups.
Suggestion: The Vertical Leg Press is a highly-rated choice for those looking to add this machine to their home gym.
Best Vertical Leg Press Variations
1. Standard Vertical Leg Press
How to do it: Lay on the machine’s backrest with feet hip-width apart on the platform. Press upward, then lower with control.
How to do it: Perform the exercise with one foot on the platform, keeping the other leg extended.
Why: Helps correct muscle imbalances and improves stability.
3. Wide-Stance Leg Press(More Glute & Hamstring Focus)
How to do it: Place your feet wider than hip-width with toes slightly pointed out.
Why: Shifts more emphasis to glutes and inner thighs.
4. Close-Stance Leg Press(More Quad Isolation)
How to do it: Position feet close together in the center of the platform.
Why: Increases quad activation for stronger front-leg muscles.
Recommendation: The Vertical Leg Press is a compact and effective choice. Supplement Pairing: Pair your leg press workouts with Creatine Monohydrate for increased strength and power.
8: Add Variety with the Smith Machine
The Smith machine often gets a bad reputation among gym-goers, with critics claiming it’s “unnatural” or “less effective” than free weights. However, when used correctly, it’s an excellent tool for strength training, stability, and muscle isolation especially for those training without a spotter.
Why the Smith Machine is Underrated?
Despite its effectiveness, the Smith machine is often overlooked because:
Fixed Bar Path – Some lifters believe it restricts natural movement, but this can actually be an advantage for controlled exercises.
Overuse of Free Weights – Many gym-goers prefer barbells and dumbbells, overlooking the unique benefits of the Smith machine.
Misconceptions – Some think it’s only for beginners, but even advanced lifters can benefit from Smith machine training.
The truth? The Smith machine offers safety, stability, and variety, making it a great addition to any workout routine.
Benefits of Using the Smith Machine
1. Increased Safety for Heavy Lifting
The guided bar allows for safer heavy lifts without needing a spotter. This makes it an excellent choice for solo workouts, especially for exercises like bench presses and squats.
2. More Controlled Movements
The fixed path reduces the need for stabilization, allowing you to focus on form and muscle activation. This is great for beginners learning proper technique and for isolating specific muscles.
3. Greater Versatility
The Smith machine isn’t just for squats! It can be used for a variety of exercises, including:
Bench presses (flat, incline, and decline)
Bulgarian split squats
Shoulder presses
Deadlifts
Glute bridges
4. Ideal for Progressive Overload
Because the bar is fixed and stable, you can increase weight more confidently over time without worrying about balance issues.
Suggestion: If you’re considering a home gym setup, the Smith Machine is a top-tier option with multiple functions.
Best Smith Machine Exercises for Strength & Muscle Growth
1. Incline Bench Press(Upper Chest & Shoulders)
How to do it: Set an adjustable bench to a 30-45° incline. Press the bar upward, keeping control through the movement.
Why: Focuses on upper chest development with a safer pressing path.
2. Bulgarian Split Squats(Leg Strength & Stability)
How to do it: Stand a few feet in front of the bar, with one foot elevated behind you. Lower into a deep lunge and press back up.
Why: Targets the quads and glutes, improving single-leg strength.
3. Smith Machine Squats(Leg Power & Hypertrophy)
How to do it: Position feet slightly forward under the bar. Squat down, keeping your chest up and core engaged.
Why: The fixed bar path reduces lower back strain, making it a great alternative to barbell squats.
4. Shoulder Press(Delts & Upper Body Strength)
How to do it: Adjust the bar to shoulder height, press it overhead, and lower with control.
Why: Safer than free weights while allowing you to push heavier loads.
How to do it: Sit on the floor with your back against a bench, roll the bar over your hips, and drive your glutes upward.
Why: Maximizes glute activation and strength gains.
Recommendation: The Smith Machine is a reliable and sturdy option. Supplement Pairing: Use Standard Whey to fuel your Smith machine workouts.
Another effective upper body movement that pairs well with Smith machine training is the upright row exercise, which targets the shoulders and traps while improving pulling strength.
9: Strengthen Your Core with the Ab Roller
The ab roller is one of the most underrated tools for core strength and stability. While it looks simple, it delivers a highly effective full-core workout. In fact, study reference show that ab rollouts activate significantly more core muscles than traditional crunches making them superior for improving stability and preventing back pain when done correctly.
Why the Ab Roller is Underrated?
Despite its effectiveness, the ab roller is often overlooked because:
It Looks Too Simple – Many assume it’s not challenging enough compared to machines or weighted ab exercises.
It’s Hard for Beginners – Without proper form, it can feel difficult, leading people to abandon it too soon.
Lack of Awareness – Some gym-goers don’t realize that ab rollouts work the entire core, shoulders, and back.
The truth? Few exercises match the ab roller’s ability to build core strength and endurance when used correctly.
Benefits of Using the Ab Roller
1. Maximum Core Activation
The ab roller engages the entire core, including:
Rectus abdominis (six-pack muscles) – Strengthens and defines your abs.
Obliques – Improves rotational strength and stability.
Transverse abdominis – Acts as a deep core stabilizer, protecting your spine.
Lower back – Helps prevent injuries by improving overall core balance.
2. Improves Full-Body Stability
Unlike sit-ups, ab rollouts require core, shoulder, and back control, improving posture and balance.
3. Portable & Budget-Friendly
The ab roller is small, lightweight, and affordable, making it perfect for home workouts and travel.
4. Progressive Difficulty for All Fitness Levels
Beginners: Start with knee roll-outs for controlled movement.
Intermediate: Increase reps and extend range of motion.
Advanced: Try standing roll-outs for an intense core challenge.
A high-quality ab roller like the Ab Carver offers extra stability and comfort for beginners and advanced users alike.
Best Ab Roller Exercises & Progressions
1. Kneeling Ab Rollouts(Best for Beginners)
How to do it:
Start on your knees, holding the ab roller.
Slowly roll forward, keeping your core tight.
Roll back to the starting position without collapsing your lower back.
Focus: Core control and stability.
2. Standing Ab Rollouts(Advanced Core Strength)
How to do it:
Stand with your feet shoulder-width apart.
Slowly roll forward as far as you can while keeping control.
Engage your core to return to standing.
Challenge: Requires serious core and upper body strength.
3. Ab Rollouts with Resistance Bands(Great for Progression)
How to do it:
Attach a resistance band to a secure point behind you.
Hold the ab roller while the band provides assistance.
Roll out slowly and return with control.
Why? Helps beginners transition to full rollouts.
4. Side-to-Side Ab Rollouts(Targets Obliques)
How to do it:
Perform the rollout at an angle instead of straight forward.
Alternate sides to engage the obliques more intensely.
Best For: Core rotation and side abs definition.
Recommendation: The Ab Carver Pro is a top-rated ab roller with added resistance. Supplement Pairing: Pair your ab workouts with BCAAs to support recovery.
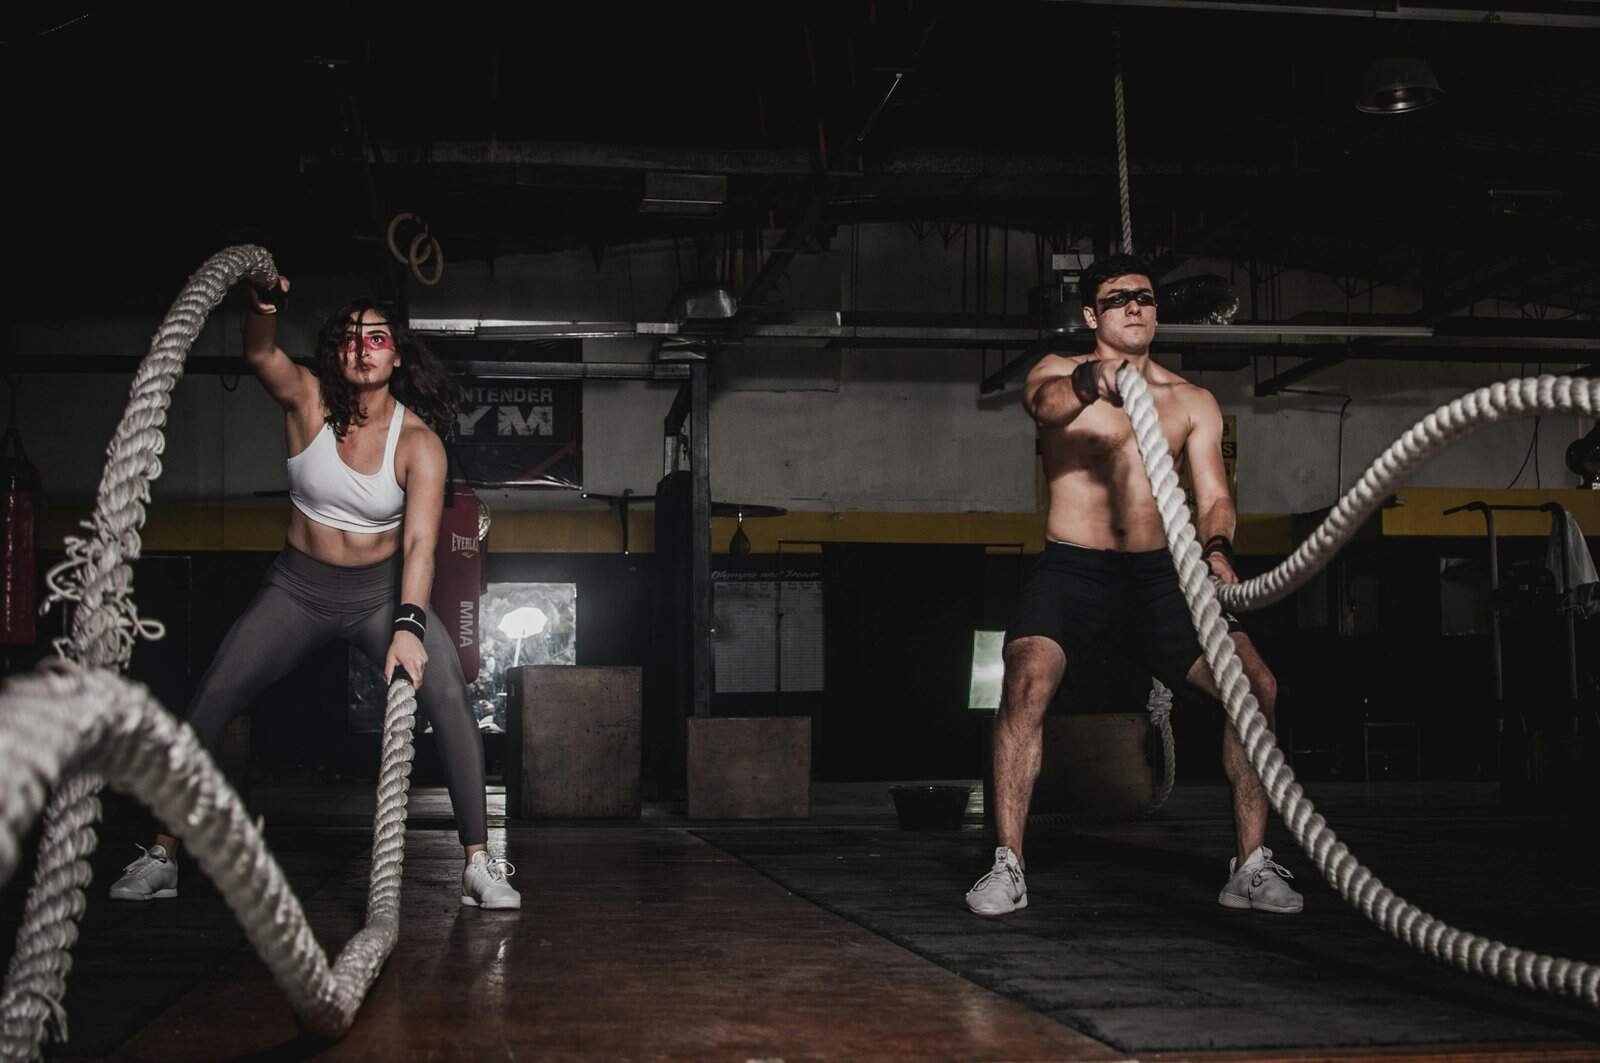
10: Finish Strong with Battle Ropes
Battle ropes are an underrated yet highly effective tool for building endurance, strength, and power. While many associate them with cardio, they engage the entire body, making them a must-have for any workout routine.
Why Battle Ropes Are Underrated?
Despite their effectiveness, battle ropes are often overlooked because:
They seem too simple many assume they’re only good for short bursts of cardio.
They’re intimidating if you’ve never used them before, they can seem overwhelming.
Lack of variety some gym-goers don’t realize how many different exercises you can do with battle ropes.
But in reality, battle ropes combine cardio, strength, and endurance training into one!
Arms & Shoulders – Constant movement builds endurance and definition.
Core – Your abs work hard to stabilize each movement.
Legs & Glutes – Squatting and lunging variations add a lower-body burn.
2. HIIT-Friendly
Battle ropes are perfect for high-intensity interval training (HIIT), allowing you to:
Burn more calories in less time.
Improve cardiovascular endurance.
Increase explosive power for sports and functional fitness.
3. Low-Impact, High-Intensity
Unlike running or jumping, battle ropes are joint-friendly while still delivering a heart-pounding workout.
4. Grip & Forearm Strength
Holding and swinging battle ropes strengthens your grip, which translates to better performance in deadlifts, pull-ups, and everyday tasks.
Best Battle Rope Exercises
1. Alternating Waves (Best for Beginners)
How to do it:
Stand with feet shoulder-width apart.
Hold one rope in each hand.
Create alternating waves by moving one arm up while the other goes down.
Why? This builds endurance and engages the core, arms, and shoulders.
2. Double Slams (Explosive Power)
How to do it:
Hold both ropes together.
Squat down and slam the ropes to the ground with force.
Stand up and repeat.
Why? Great for power, endurance, and fat loss.
3. Side-to-Side Waves (Core Focused)
How to do it:
Move both arms side to side, keeping your core engaged.
Control the movement rather than relying on momentum.
Best For: Strengthening the obliques and improving rotational power.
4. Battle Rope Jump Slams (Lower-Body Burn)
How to do it:
Hold both ropes and jump as you slam the ropes down.
Land softly in a squat and repeat.
Why? This engages the legs while keeping your heart rate up.
Recommendation: The Battle Ropes are durable and affordable. Supplement Pairing: Replenish your energy post-workout with Standard Whey
Why Trust Us?
We’re fitness enthusiasts who’ve spent years exploring gym equipment, supplements, and optimizing workouts. Our recommendations are based on real-world experience and a passion for helping others achieve their fitness goals.
Ready to Level Up Your Workouts?
Don’t let these underrated machines gather dust! Give them a try and experience the gains you’ve been missing. Pair them with the recommended supplements for even better results. Share your progress with us in the comments below we’d love to hear how these machines have transformed your routine.
Frequently Asked Questions (FAQ)
1. What are the most underrated gym machines for muscle growth?
Many gym-goers overlook powerful machines like the landmine attachment, reverse hyperextension machine, and Glute-Ham Developer (GHD). These machines target specific muscle groups, improve functional strength, and reduce injury risk, making them essential for muscle growth and strength training.
2. Is the Smith machine good for strength training?
Yes! While some criticize the Smith machine for its fixed movement path, it’s great for controlled, heavy lifts without a spotter. It’s especially useful for squats, presses, and Bulgarian split squats, helping you progressively overload safely.
3. How does the reverse hyperextension machine benefit lower back health?
The reverse hyperextension machine is one of the best for spinal decompression, strengthening the glutes, hamstrings, and lower back while reducing stress on the spine. This makes it ideal for preventing lower back pain and improving athletic performance.
4. What are the best full-body gym machines for fat loss?
Machines like the sled push, battle ropes, and functional trainer (dual cable machine) engage multiple muscle groups, helping you burn more calories while building strength. These are excellent choices for HIIT workouts and fat loss training.
5. How can beginners use the assisted pull-up/dip machine effectively?
The assisted pull-up/dip machine is perfect for beginners working toward unassisted pull-ups and dips. Start with higher assistance and gradually reduce the weight support over time to build upper body strength.
Disclaimer
This post may contain affiliate links, which means we may earn a small commission if you purchase through our links. This comes at no extra cost to you and helps support the creation of more content like this. Thank you for your support!
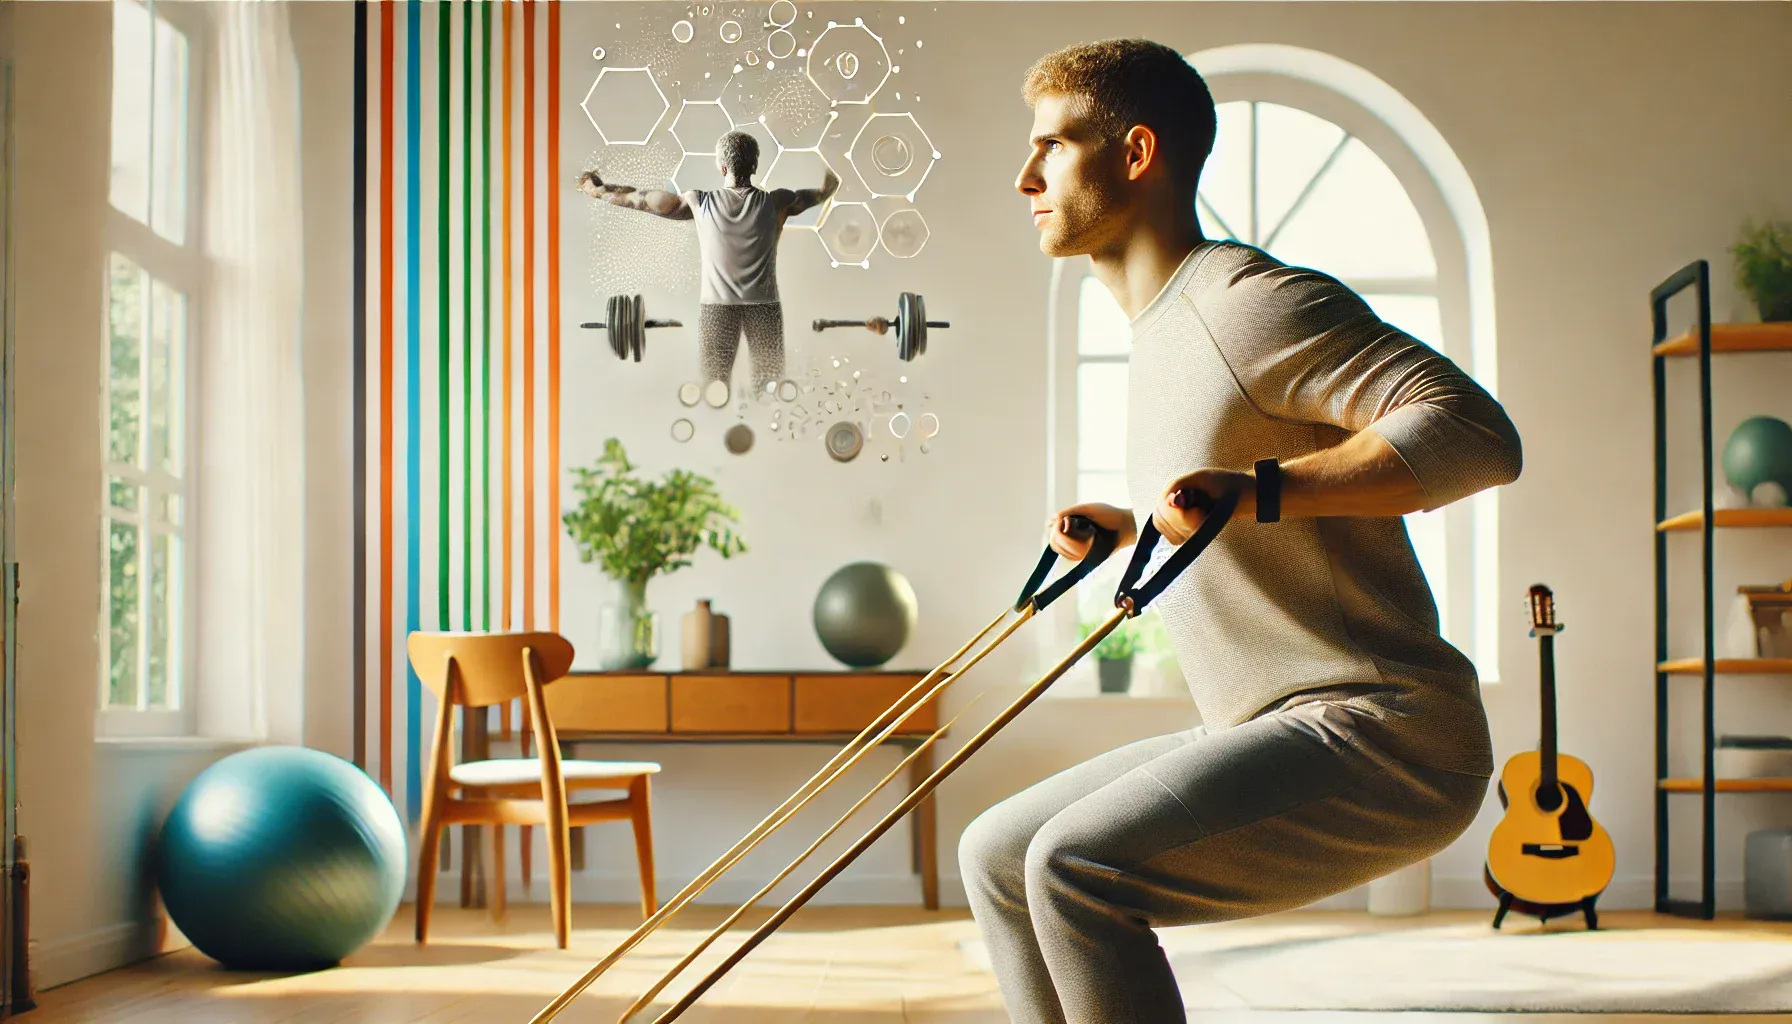
Tired of dragging yourself to the gym or lifting heavy weights that wreck your joints? You’re not alone. That’s exactly why I started using resistance bands for strength training and it changed everything. These simple-looking bands might not look like much, but they’re a powerful tool for building muscle, improving flexibility, and strengthening your body without excessive strain. If you want to understand how different training tools work together in a complete home fitness setup, this detailed fitness equipment guide explains how to choose the right equipment for strength, fat loss, and performance.
1. What Are Resistance Bands?
Resistance bands are elastic bands made from durable materials such as latex or fabric. They come in various shapes, sizes, and resistance levels, making them incredibly versatile and suitable for a wide range of exercises and fitness levels. These portable, easy-to-use tools can help improve strength, flexibility, and muscle tone while also supporting rehabilitation and injury recovery.
Types of Resistance Bands:
Loop Bands: These continuous bands are perfect for lower body workouts like squats, glute bridges, and leg presses. They offer excellent resistance for targeting the hips, glutes, and thighs.
Tube Bands with Handles: These bands, equipped with handles, are ideal for upper body exercises such as bicep curls, shoulder presses, and chest flies. The handles make them easier to grip, providing a more comfortable workout experience.
Therapy Bands: Typically lighter in resistance, therapy bands are great for rehabilitation, stretching, and flexibility exercises. They’re often used by physical therapists to assist with muscle recovery and mobility.
Figure-8 Bands: Shaped like an “8,” these bands are designed for targeted muscle engagement and are great for exercises that require focused, isolated movements such as shoulder rotations or arm raises.
2. Why Resistance Bands for Strength Training Are a Secret Weapon for Building Muscle
Resistance bands offer numerous advantages that make them a must-have tool for any fitness routine. Many athletes also include them alongside other athletic training equipment to improve mobility, stability, and explosive strength. Whether you’re aiming for strength, flexibility, or rehabilitation, resistance bands can be easily incorporated into your workouts for maximum results.
1. Versatility
Full-Body Workouts: Resistance bands can be used for exercises targeting all major muscle groups, including your arms, legs, chest, back, and core. This makes them perfect for full-body routines and functional training.
Portability: Lightweight and compact, resistance bands are easy to carry and store, making them ideal for home workouts, travel, or outdoor training. No need for bulky equipment!
2. Adjustable Resistance
Progressive Overload: Unlike traditional weights, resistance bands allow you to easily adjust the resistance by switching to a different band or adjusting your grip. This makes them perfect for progressive training and gradually increasing resistance.
Constant Tension: Resistance bands provide tension throughout the entire range of motion, which helps maximize muscle engagement and improve strength. This is a major advantage over free weights, which may lose tension at certain points in the movement.
3. Joint-Friendly
Low Impact: Resistance bands are gentle on the joints, making them a great option for individuals looking to reduce strain while still building strength and endurance.
Rehabilitation: They’re commonly used in physical therapy to assist with injury recovery or to improve flexibility and mobility, offering a safe and effective way to regain strength.
4. Cost-Effective
Affordable: A set of resistance bands is much cheaper than purchasing a full set of dumbbells or other gym equipment, making them an accessible option for those on a budget.
Space-Saving: Their compact design means they can easily fit into small spaces, perfect for small home gyms or apartment workouts.
Reference: These Resistance Bands are a top choice for durability and comfort, offering various resistance levels for all fitness levels.
3. Top Resistance Band Exercises Using Resistance Bands for Strength Training
Resistance bands are an incredibly versatile tool for targeting all major muscle groups. By using them, you can perform a wide variety of exercises that focus on strength, stability, and flexibility. Here are some of the best exercises to incorporate into your routine for building strength in different areas of your body:
Lower Body
Banded Squats Targeted Muscles: Glutes, Quads, Hamstrings How to Do It:
Place a loop band just above your knees (or at ankle level for higher resistance).
Stand with feet shoulder-width apart, engaging your core and keeping your chest lifted.
Lower into a squat position, ensuring that your knees do not cave inward. Push through your heels as you return to standing. Why It Works: The added resistance from the band forces your glutes, quads, and hip abductors to work harder, helping to activate and strengthen these muscles during the squat movement. The band also improves knee tracking, making the exercise more effective for developing lower body strength.
Glute Bridges Targeted Muscles: Glutes, Hamstrings How to Do It:
Place a resistance band around your thighs, just above your knees. Lie on your back with knees bent and feet flat on the floor.
Press through your heels and lift your hips toward the ceiling while squeezing your glutes at the top of the movement.
Lower your hips back down, maintaining control of the movement. Why It Works: The resistance band helps increase glute activation by preventing your knees from collapsing inward. This allows for a more focused and effective glute contraction. It also targets the hamstrings and engages your core for stability during the lift.
Lateral Walks Targeted Muscles: Outer Glutes, Hip Abductors How to Do It:
Place a loop band around your thighs, just above the knees, or at your ankles for higher resistance.
With knees slightly bent, step side-to-side in a squat-like position, making sure to keep constant tension on the band.
Perform the exercise for 10-15 steps in one direction before reversing and walking back. Why It Works: Lateral walks target the outer glutes (gluteus medius) and hip abductors, muscles crucial for improving hip stability and leg strength. The constant tension from the resistance band challenges the stabilizing muscles, improving balance and coordination.
Upper Body
Banded Rows Targeted Muscles: Back, Biceps, Shoulders How to Do It:
Secure a tube band to a sturdy object, such as a door handle or heavy furniture.
Stand with feet hip-width apart, holding the handles with palms facing each other.
Step back to create tension in the band, then pull the handles toward your chest while squeezing your shoulder blades together.
Slowly return to the starting position, maintaining tension in the band. Why It Works: Banded rows target your back, biceps, and rear deltoids (shoulders). The added tension from the band ensures your muscles are engaged throughout the entire range of motion. This exercise mimics the movement pattern of a row, which is essential for strengthening your upper back and improving posture.
Shoulder Press Targeted Muscles: Shoulders, Triceps How to Do It:
Step on the middle of the resistance band with both feet and hold the handles at shoulder height, elbows bent at a 90-degree angle.
Press the handles overhead until your arms are fully extended, engaging your shoulders and triceps.
Slowly lower the handles back to shoulder height. Why It Works: The shoulder press is an excellent exercise for strengthening the shoulders, particularly the deltoids. The resistance band provides constant tension, ensuring muscle engagement throughout the entire movement. This exercise also activates the triceps, helping to build strength and muscle endurance in the upper arms.
Bicep Curls Targeted Muscles: Biceps How to Do It:
Stand on the resistance band with feet shoulder-width apart. Grab the handles with palms facing upward, elbows close to your sides.
Curl the handles toward your shoulders, keeping your elbows stationary.
Slowly lower the handles back to the starting position. Why It Works: Bicep curls with resistance bands provide a unique challenge as the band tension increases as you curl. This ensures that your biceps are under tension throughout the entire range of motion, helping to maximize muscle engagement and stimulate growth.
Core
Russian Twists Targeted Muscles: Obliques, Core How to Do It:
Sit on the floor with your knees bent and feet flat. Loop the resistance band around your feet and hold the handles with both hands.
Lean back slightly while keeping your back straight and core engaged.
Twist your torso from side to side, tapping the band handles on the floor next to each hip. Why It Works: Russian twists with resistance bands activate the obliques and improve rotational strength, which is essential for functional movement patterns. The band adds resistance, forcing the core to work harder during the twisting motion.
Plank with Rows Targeted Muscles: Core, Back, Biceps How to Do It:
Assume a plank position with your feet on the floor and the resistance band anchored to a sturdy object in front of you.
Hold the band handles with one hand while keeping your core tight and body in a straight line.
Perform a row by pulling the band toward your torso, focusing on using your back and biceps to initiate the movement.
Alternate arms, performing one row at a time while maintaining a stable plank position. Why It Works: This exercise combines the core-stabilizing benefits of a plank with the added resistance of rows, targeting your back, core, and arms. It’s excellent for improving overall strength and endurance while engaging multiple muscle groups at once.
Reference: The Resistance Bands are perfect for upper and lower body exercises.
4. How to Choose the Right Resistance Bands
Choosing the right resistance bands is key to getting the most out of your workouts. Here are some important factors to consider when selecting resistance bands that suit your fitness goals and needs:
1. Resistance Levels
Resistance bands come in various resistance levels, typically ranging from light to heavy. Choosing the right level of resistance is crucial for progressively building strength and avoiding injury.
Light Resistance: Ideal for beginners, rehab exercises, or those working on mobility and flexibility.
Medium Resistance: Suitable for intermediate users or for exercises targeting larger muscle groups like squats or chest presses.
Heavy Resistance: Best for advanced lifters who are looking to challenge their muscles and perform exercises that require higher intensity.
Tip: If you’re new to resistance bands, start with lighter bands to learn proper form and technique. As you gain strength and confidence, you can increase the resistance by using heavier bands.
2. Material
Resistance bands are made from either latex or fabric, each with its own set of benefits.
Latex Bands:
Pros: Highly stretchy, durable, and provide a good amount of resistance. They’re perfect for a wide variety of exercises and movements.
Cons: Some individuals may have latex allergies, and latex bands can wear out over time, especially with frequent use.
Fabric Bands:
Pros: More comfortable to use, especially for exercises like hip thrusts or glute bridges. They are less likely to snap or roll up during use and offer a more consistent resistance.
Cons: Less stretchy than latex bands, so they may not provide as much flexibility for certain exercises (like bicep curls).
Tip: For general strength training, latex bands tend to offer more versatility, while fabric bands are better for lower-body exercises where comfort and grip are priorities.
3. Accessories
Some resistance band sets come with accessories that enhance your workout experience and provide more variety.
Handles: Most resistance bands come with handles, which make exercises like rows, presses, and curls more comfortable and effective by giving you better grip and control.
Door Anchors: These allow you to securely attach the band to a door, providing the ability to perform a wider range of exercises that simulate cable machine movements, such as chest presses, lat pull-downs, and tricep extensions.
Carrying Bags: If you plan to take your resistance bands on the go or need an organized way to store them, a carrying bag can help keep everything together.
Tip: Look for sets that include accessories like door anchors or handles to make your workouts more versatile. These extras can significantly expand your exercise options.
4. Length and Width
Resistance bands come in various lengths and widths, which can affect how they’re used in exercises.
Short Bands (10–12 inches): Typically used for lower-body exercises like squats or glute activation.
Long Bands (around 4 feet): Offer more range for upper-body exercises like shoulder presses, rows, and bicep curls.
Tip: Longer bands offer more versatility for full-body workouts, while shorter bands are ideal for specific lower-body movements.
Top Pick: A 5-band set with different resistance levels, perfect for beginners and advanced users.
5. Supplement Suggestions for Resistance Band Workouts
Pair your resistance band workouts with the right supplements to maximize results:
Whey Protein: Supports muscle recovery and growth after strength training.
BCAAs (Branched-Chain Amino Acids): Reduces muscle soreness and fatigue during workouts.
Creatine Monohydrate: Enhances strength and performance.
6. Tips for Maximizing Your Resistance Band Workouts
Warm-Up: Use lighter bands to warm up your muscles before starting your workout.
Focus on Form: Maintain proper form to avoid injury and maximize muscle engagement.
Mix It Up: Combine resistance bands with other equipment like dumbbells or bodyweight exercises for variety.
Track Progress: Gradually increase resistance or reps to challenge your muscles over time.
Reference: The Resistance Band Set includes a guidebook with workout ideas.
Resistance bands are an excellent addition to any home gym setup because they are among the most practical home workout gear options for building strength, mobility, and endurance without bulky machines. They provide effective and efficient workouts while saving both money and space. Here’s why resistance bands are a must-have for your home gym:
1. Affordable
One of the biggest advantages of resistance bands is their affordability. Unlike bulky machines or expensive gym memberships, a set of resistance bands can cost you a fraction of the price, making them ideal for those on a budget. You can purchase high-quality resistance bands for a low cost, yet they provide just as much value for muscle building, strength training, and fat loss as traditional gym equipment.
Cost Comparison: Resistance bands cost much less than free weights, machines, or other home gym equipment.
Long-Lasting: With proper care, resistance bands can last for years, offering great value over time.
2. Space-Saving
If you’re limited on space, resistance bands are an ideal choice. They are lightweight, compact, and easy to store. Unlike large gym machines that require considerable floor space, you can keep resistance bands in a drawer, bag, or a small corner of your home. This makes them perfect for apartments, small rooms, or even when you’re traveling.
Easy Storage: Simply roll up the bands and store them in a drawer, bag, or hang them on a hook.
Portable: Take them anywhere! Use them at home, in the park, or while traveling without taking up valuable space in your suitcase.
3. Versatile
Resistance bands are incredibly versatile and can be used for a wide range of exercises targeting all major muscle groups. Whether you’re doing full-body workouts, isolating specific muscles, or incorporating them into your cardio routine, resistance bands can do it all.
Target Different Muscle Groups: Use resistance bands for upper-body (arms, shoulders, chest), lower-body (legs, glutes), and core exercises (ab twists, planks with resistance).
Suitable for All Fitness Levels: Resistance bands come in various resistance levels (light to heavy), making them accessible for beginners and challenging enough for advanced users.
Customization: Combine multiple bands to increase resistance, or adjust your grip and body positioning to modify the difficulty of exercises.
Reference: The Resistance Bands are durable and ideal for home workouts.
Conclusion
Resistance bands are the secret weapon for strength training that every fitness enthusiast should have in their toolkit. They’re versatile, affordable, and effective for building strength, improving mobility, and enhancing your overall fitness. Whether you’re working out at home, traveling, or adding variety to your gym routine, resistance bands are a must-have.
FAQ
1. What are the benefits of using resistance bands for strength training?
Resistance bands offer several key benefits for strength training, including versatility, joint-friendly workouts, and portability. They allow you to perform a wide range of exercises targeting all major muscle groups, from your upper body to your legs and core. Resistance bands provide constant tension, maximizing muscle engagement throughout each movement. They’re also great for those who want to minimize joint strain while still building strength, making them perfect for people with injuries or those looking for low-impact exercises.
2. How do resistance bands compare to traditional weights for strength training?
Resistance bands offer a unique advantage over traditional weights by providing continuous tension throughout the entire range of motion. This helps increase muscle engagement more consistently. Unlike dumbbells or barbells, resistance bands also allow for a greater variety of exercises and are more portable and space-efficient. While weights are excellent for building muscle mass through progressive overload, resistance bands can be used for full-body workouts and are easier on the joints, making them ideal for rehabilitation or those new to strength training.
3. Can resistance bands help build muscle as effectively as free weights?
Yes, resistance bands can help build muscle effectively when used correctly. The key to muscle growth is progressive resistance, which is achievable with resistance bands by adjusting the tension or using bands with varying resistance levels. Although free weights are great for progressive overload and maximum muscle stimulation, resistance bands still provide an excellent workout that targets both small stabilizing muscles and larger muscle groups. By incorporating both into your routine, you can maximize muscle development while reducing the risk of injury.
4. What type of resistance band is best for beginners?
For beginners, light to medium resistance bands are ideal. These bands offer a manageable level of resistance, making it easier to learn proper form and technique without straining the muscles. Loop bands or tube bands with handles are great for basic exercises such as bicep curls, squats, and shoulder presses. As you progress, you can gradually increase the resistance to challenge your muscles further and enhance strength gains. If you’re unsure where to start, look for a set of bands with varying resistance levels to accommodate your growing strength.
5. How can I incorporate resistance bands into my home workout routine?
Incorporating resistance bands into your home workout routine is simple and effective. Start with exercises like squats, glute bridges, and rows to engage multiple muscle groups. Resistance bands can easily complement bodyweight exercises or be added to dumbbell routines for extra resistance. For a full-body workout, try circuit training that includes exercises targeting the legs, arms, core, and back. Their portability makes them perfect for any space, whether you’re in a small apartment or traveling. You can even take them outdoors to vary your routine and add fresh challenges.
Disclaimer
The information provided in this article is for educational purposes only and is not a substitute for professional fitness advice. Always consult a certified trainer or healthcare provider before starting a new workout routine or taking supplements. Some links in this article may be affiliate links, which means I may earn a small commission at no extra cost to you if you make a purchase.
Kettlebells vs barbells is one of the most common debates in strength training. Both are powerful strength training tools, but depending on your goals, one may outperform the other. If you want a deeper understanding of how different workout tools fit into a complete training setup, this detailed fitness equipment guide explains how to choose the right equipment for fat loss, strength, and performance.
1. Kettlebells vs Barbells Fat Burning Basics: What You Need to Know
Before we compare their fat-burning potential, it’s important to first understand what each of these tools brings to the table in terms of exercise benefits.
Kettlebells: Versatile and Dynamic
Kettlebells are cast-iron weights with a handle, designed for dynamic, full-body movements. Unlike traditional dumbbells, the unique shape of kettlebells allows for swinging and fluid, explosive motions. These movements engage multiple muscle groups and are perfect for high-intensity interval training (HIIT), functional training, and improving cardiovascular health.
Benefits of Kettlebells:
Full-Body Engagement: Exercises like swings, snatches, and cleans target the entire body, engaging both the upper and lower body, along with your core.
Improves Strength and Endurance: The swinging motion of kettlebells provides both strength-building and endurance benefits, helping you burn fat and build lean muscle.
Functional Fitness: Kettlebell exercises mimic real-life movements, improving functional strength and agility, which is useful for everyday activities and sports.
Barbells: Strength Training Powerhouses
Barbells are long metal bars used with weight plates for traditional strength training exercises. They’re ideal for heavy lifting and focusing on building muscle mass through exercises like squats, deadlifts, and bench presses. Barbells allow for progressive overload, making them great for advanced strength training and maximizing muscle growth.
Benefits of Barbells:
Heavy Lifting and Muscle Building: Barbells are designed to support heavy weight, allowing for maximum muscle stimulation and strength development.
Targeted Strength: Exercises like squats, deadlifts, and bench presses specifically target larger muscle groups, making them excellent for muscle building and improving overall strength.
Versatile: Barbells offer a wide range of exercises that focus on different muscle groups, making them great for structured strength training routines.
2. Kettlebells vs Barbells Fat Burning Mechanisms Compared
Fat burning depends on calorie expenditure, muscle engagement, and workout intensity. Choosing the right equipment for fat loss can dramatically improve calorie burn and workout efficiency. Here’s how kettlebells and barbells stack up:
Kettlebells:
High-Intensity Workouts: Kettlebell exercises like swings and snatches are explosive and fast-paced, keeping your heart rate elevated.
Full-Body Engagement: Movements like the kettlebell swing engage multiple muscle groups, leading to higher calorie burn.
Afterburn Effect: The intense nature of kettlebell workouts can increase EPOC (Excess Post-Exercise Oxygen Consumption), helping you burn calories even after your workout.
Barbells:
Strength and Muscle Building: Barbell exercises like squats and deadlifts are excellent for building muscle, which boosts your resting metabolic rate (RMR) over time.
Heavy Lifting: Lifting heavier weights with barbells burns calories during the workout and supports long-term fat loss by increasing muscle mass.
Controlled Movements: Barbell exercises are slower and more controlled, which may not burn as many calories during the workout compared to kettlebells.
3. Kettlebells vs Barbells: Which Fat Burning Method Works Best?
The answer largely depends on your workout style, fitness level, and goals. Many lifters also compare other training styles such as dumbbells vs machines when deciding which strength equipment delivers the best results for muscle growth and fat loss. Both kettlebells and barbells can help you burn fat, but their effectiveness in fat loss varies based on how you incorporate them into your training routine.
Kettlebells for Short-Term Fat Loss
Kettlebells are fantastic for burning calories quickly and efficiently. Their dynamic, full-body movements elevate your heart rate and engage multiple muscle groups simultaneously. This leads to a high caloric burn during the workout and an extended afterburn effect (EPOC – Excess Post-Exercise Oxygen Consumption), meaning you continue burning calories even after the session ends.
Why Kettlebells Excel for Fat Loss:
High-Intensity Workouts: Kettlebells are perfect for HIIT-style workouts, which are known for their ability to burn a significant amount of calories in a short time.
Full-Body Movements: Exercises like swings, snatches, and goblet squats target multiple muscle groups at once, increasing the overall energy expenditure.
Afterburn Effect: The intense nature of kettlebell training causes your body to continue burning calories after the workout, making it ideal for fat loss.
Example Kettlebell Workout for Fat Loss:
20-minute kettlebell circuit:
1 minute of kettlebell swings
1 minute of kettlebell snatches (alternate sides)
1 minute of goblet squats
1 minute rest
Repeat for 4 rounds.
Barbells for Long-Term Fat Loss
If your goal is to build muscle and increase your metabolic rate over time, barbells are an excellent choice. While they may not provide the immediate calorie burn of a high-intensity kettlebell workout, strength training with barbells leads to significant muscle growth. More muscle mass results in a higher resting metabolic rate, meaning your body will burn more calories even while at rest.
Why Barbells Excel for Long-Term Fat Loss:
Muscle Building: Barbell exercises like squats, deadlifts, and bench presses are designed to target large muscle groups, stimulating muscle growth and enhancing overall strength.
Increased Resting Metabolic Rate: The more muscle you build, the higher your metabolism will be, leading to more calories burned throughout the day even when you’re not working out.
Progressive Overload: Barbells allow for gradual increases in weight, which promotes continuous muscle growth and fat loss over time.
Example Barbell Workout for Long-Term Fat Loss:
Heavy Barbell Strength Training Routine:
4 sets of heavy squats (8–12 reps)
4 sets of deadlifts (6–8 reps)
4 sets of bench presses (8–10 reps)
Rest 2 minutes between sets.
This workout focuses on compound movements that engage multiple muscle groups and build muscle mass, leading to increased fat loss over time.
4. How to Combine Kettlebells vs Barbells for Fat Burning Success
Why choose one when you can have the best of both worlds? By combining kettlebells and barbells in your routine, you can maximize fat loss while also improving strength, endurance, and overall fitness. Kettlebells provide the high-intensity, calorie-torching workout you need for short-term fat loss, while barbells focus on building muscle and boosting metabolism for long-term fat-burning results.
Benefits of Combining Kettlebells and Barbells:
Enhanced Fat Loss: Kettlebell HIIT workouts help you burn fat quickly, while barbell strength training builds muscle, increasing your resting metabolic rate over time.
Balanced Routine: Combining both forms of training ensures you’re hitting all aspects of fitness strength, endurance, and flexibility.
Variety: Mixing kettlebells and barbells prevents your workouts from getting stale, keeps things exciting, and reduces the risk of plateaus.
Example Routine:
Day 1: Barbell Strength Training
Focus on compound movements like squats, deadlifts, and bench presses to build muscle.
Day 2: Kettlebell HIIT Workout
Perform high-intensity kettlebell exercises like swings, snatches, and cleans to burn calories and improve cardiovascular health.
Day 3: Active Recovery or Cardio
Engage in light activity such as walking, swimming, or yoga to aid recovery and maintain mobility.
5. Best Supplements to Boost Kettlebells vs Barbells Fat Burning Workouts
Pair your workouts with the right supplements to boost fat loss and recovery:
For Kettlebell Workouts:
BCAAs (Branched-Chain Amino Acids): Reduce fatigue and support muscle recovery during high-intensity workouts.
Pre-Workout: Boost energy and focus for explosive kettlebell sessions.
For Barbell Workouts:
Whey Protein: Support muscle recovery and growth after heavy lifting.
Creatine Monohydrate: Enhance strength and performance during barbell exercises.
6. Top Gear for Kettlebells vs Barbells Fat Burning Routines
Here are some top-rated options for both tools:
Kettlebells:
Enamel Coated Kettlebell: Durable and affordable.
Cast Iron Kettlebell: Great for beginners.
Barbells:
A high-quality barbell for serious lifters.
Barbell Olympic Bar: A budget-friendly option for home gyms.
7. Final Verdict on Kettlebells vs Barbells Fat Burning Effectiveness
When deciding between kettlebells and barbells, it ultimately depends on your goals, workout style, and available equipment. Both tools offer distinct advantages for fat loss and fitness, so it’s important to choose the one (or both) that best aligns with your needs.
You want to burn calories quickly with high-intensity, full-body workouts.
You prefer dynamic movements that engage multiple muscle groups.
You have limited space or equipment, as kettlebells are compact and versatile.
Choose Barbells If:
Your goal is to build muscle and increase long-term fat loss through muscle growth.
You enjoy heavy lifting and structured strength training routines.
You have access to a gym or a home setup with enough space for barbell exercises.
Best Option:
Combine Both for a well-rounded fitness routine that maximizes fat loss and muscle building. Kettlebells offer high-calorie burn and functional strength, while barbells provide the muscle-building foundation for long-term fat loss and increased metabolism.
FAQ
1. Which burns fat faster, kettlebells or barbells?
Kettlebells are generally more effective for quick fat burning due to their dynamic, high-intensity movements. Exercises like kettlebell swings and snatches keep your heart rate elevated and engage multiple muscle groups, promoting a higher calorie burn. These workouts are also known for their afterburn effect, meaning you continue burning calories long after your workout ends. However, barbells are excellent for long-term fat loss by building muscle mass, which increases your metabolism and calorie burn even at rest.
2. Are kettlebell workouts better for fat loss than barbell workouts?
It depends on your fitness goals. Kettlebells are perfect for short-term fat loss because their full-body, high-intensity exercises elevate your heart rate and maximize calorie burn during and after your workout. On the other hand, barbell workouts focus on strength and muscle building, which boosts your resting metabolic rate over time. Both are effective, but kettlebells may give quicker fat-burning results in a more time-efficient manner.
3. Can I use kettlebells and barbells together for better fat-burning results?
Yes, combining kettlebells and barbells in your fitness routine is an excellent strategy for maximizing fat loss. Kettlebells provide high-intensity, calorie-torching exercises, while barbells help build muscle, which increases your metabolism. A balanced routine, like alternating kettlebell HIIT sessions and barbell strength training, allows you to burn fat while also enhancing muscle growth for long-term fat loss benefits.
4. How do kettlebells contribute to faster fat burning compared to barbells?
Kettlebells excel at burning fat due to their dynamic and explosive movements, such as swings and snatches, which engage both the upper and lower body. This full-body engagement keeps your heart rate elevated, maximizing calorie burn. Additionally, the high-intensity nature of kettlebell exercises activates the afterburn effect, meaning you burn more calories even after the workout ends. Barbells, on the other hand, are slower-paced and focus more on building muscle, which supports long-term fat loss.
5. Which is more effective for fat loss, kettlebells or barbells, for beginners?
For beginners, kettlebells may be more effective for fat loss due to their versatility and the ability to perform full-body, high-intensity exercises. They are ideal for engaging multiple muscle groups at once, making them great for a fast calorie burn. While barbells are powerful for building muscle, they often require more experience and proper form to avoid injury. Kettlebells are generally easier to learn and can be incorporated into a variety of fitness routines, making them a great starting point for those focused on fat loss.
Disclaimer
The information provided in this article is for educational purposes only and is not a substitute for professional fitness advice. Always consult a certified trainer or healthcare provider before starting a new workout routine or taking supplements. Some links in this article may be affiliate links, which means I may earn a small commission at no extra cost to you if you make a purchase.
Dumbbells vs machines muscle growth has long been a hot debate in the fitness world. Some lifters swear by free weights, while others rely on machines for controlled and targeted training. Understanding how each piece of equipment contributes to muscle development can help you build a smarter workout routine. If you want to understand how different training tools work together for strength, fat loss, and performance, this complete fitness equipment guide explains how to choose the right equipment for your goals.
1. Dumbbells: The Free Weight Advantage
Dumbbells are a versatile and essential tool for building muscle, improving strength, and enhancing functional fitness. Whether you’re looking to target specific muscle groups or perform full-body workouts, dumbbells offer a wide range of benefits that machines can’t match.
Why They’re Great for Muscle Growth
Greater Range of Motion and Muscle Activation
Unlike machines that guide your movements along a fixed path, dumbbells are free weights. This freedom allows for a greater range of motion, which is key for activating more muscle fibers. Research shows that free weights like dumbbells engage more stabilizer muscles than machines, which leads to better overall muscle development and functional strength.
Engages Stabilizer Muscles
When using dumbbells, your body must stabilize itself during each movement. This activates smaller, often overlooked muscles, particularly in the core, shoulders, and wrists. Engaging these stabilizer muscles helps improve balance, coordination, and functional strength, which translates to better performance in daily activities and sports.
Improved Muscle Symmetry
Because dumbbells are used one arm or leg at a time, they can help correct muscle imbalances. If one side of your body is weaker than the other, dumbbells allow you to focus on strengthening the weaker side, promoting muscle symmetry and preventing injury.
Supports Functional Strength
Dumbbells mimic real-life movements more closely than machines, which often isolate muscle groups. The ability to move freely in multiple directions makes dumbbell exercises more functional, preparing you for everyday movements like lifting, bending, or reaching.
How to Use Dumbbells Effectively
For Muscle Growth:
Focus on performing compound movements like squats, lunges, presses, and rows to work multiple muscle groups at once and stimulate muscle growth.
For Improving Muscle Symmetry:
Include single-arm and single-leg exercises, such as dumbbell presses, curls, or lunges, to work each side of the body independently.
For Functional Strength:
Incorporate dynamic exercises like dumbbell snatches, cleans, or farmer’s walks to build strength that directly benefits everyday activities.
Benefits of Using Dumbbells
Increased Muscle Activation: Engage more muscle fibers than machines, leading to better overall muscle growth.
Enhanced Functional Strength: Mimic real-life movements to build strength that improves your daily activities.
Corrects Muscle Imbalances: Work each side of the body independently to improve muscle symmetry.
Versatility: Suitable for a wide range of exercises, from strength training to flexibility and endurance workouts.
For a structured dumbbell workout plan, expert-led routines are available to guide you through effective exercises for muscle growth, symmetry, and functional strength.
Pro Tip: If you’re short on space, try adjustable dumbbells. They save space and offer a range of weights in one set.
Supplement Suggestion: A protein powder can help your muscles recover and grow stronger after strength training.
2. Machines: Controlled and Isolated Movements
Machines offer a unique advantage for building muscle, especially when it comes to targeting specific muscle groups and improving form. Many lifters rely on specific gym machines for muscle development to isolate weaker areas and build balanced strength. Whether you’re a beginner or an experienced lifter, machines can help you achieve focused muscle growth with controlled and safe movements.
Why They’re Great for Muscle Growth
Isolate Specific Muscle Groups
Machines are designed to target specific muscles, making them perfect for isolating weaker areas or improving strength imbalances. If you’re looking to build up a particular muscle group, machines allow you to focus all of your effort on that muscle without involving other areas of the body.
Controlled Range of Motion for Safer Movements
One of the main benefits of machines is the controlled range of motion they provide. By guiding your movements along a fixed path, machines help ensure proper form, reducing the risk of injury especially for beginners who may not yet have perfected their technique.
Great for Beginners
For those new to strength training, machines can provide an easy introduction to gym equipment. Since they require less coordination and balance than free weights, machines help build confidence while teaching proper movement patterns. As you gain strength and experience, you can transition to free weights to challenge your muscles in new ways.
Ideal for Injury Recovery
Machines are often recommended for those recovering from injuries. They allow you to target muscles in a controlled manner, which reduces the likelihood of straining or reinjuring a recovering area. This makes machines an excellent tool for rehabilitation and regaining strength after an injury.
How to Use Machines Effectively
For Targeted Muscle Growth:
Focus on one machine at a time, ensuring you’re isolating the muscle group you want to work (e.g., leg press for quads, chest press for pectorals).
For Beginners:
Start with lighter weights to master the proper form before increasing intensity. Always check your posture and adjust the machine settings to suit your body.
For Injury Recovery:
Use machines with lighter resistance to slowly reintroduce movement to a particular muscle group. Be sure to consult with a healthcare professional to choose the right machines for your rehabilitation.
Benefits of Using Machines
Isolate Target Muscles: Perfect for focusing on specific muscle groups, especially weak points or areas needing improvement.
Safer for Beginners: Provide a controlled movement, making them easier to use with less risk of improper form or injury.
Ideal for Injury Recovery: Controlled motion makes it easier to work through rehabilitation safely.
Consistency and Focus: Guide movements and ensure consistent form, helping you focus on muscle development.
For structured machine-based workout plans, expert-led programs can help guide you through effective routines for strength building, muscle isolation, and recovery.
Pro Tip: If you’re new to machines, try a leg press machine. It’s great for building lower body strength without straining your back.
Supplement Suggestion: A creatine supplement can enhance muscle strength and growth during machine workouts.
3. Dumbbells vs. Machines: The Science Behind Muscle Activation
When it comes to building muscle and achieving fitness goals, both dumbbells and machines have their unique advantages. Understanding how each type of equipment activates muscles can help you make more informed decisions about your workouts.
The Shocking Truth
Dumbbells Activate More Muscle Fibers
Research has shown that dumbbells activate a greater number of muscle fibers compared to machines. This is because dumbbells are free weights, meaning they require more stabilization from supporting muscles to control the movement. Stabilizer muscles such as those in your core, shoulders, and wrists are actively engaged when you lift dumbbells, leading to better overall muscle development and functional strength.
By using dumbbells, you’re training your body to work as a unit, improving balance, coordination, and strength. The increased activation of muscle fibers helps you build functional strength that translates to better performance in both everyday tasks and sports.
Machines Are Better for Isolation
While dumbbells engage multiple muscle groups at once, machines are specifically designed to isolate certain muscles. This can be beneficial if you want to target weak points or improve muscle imbalances. For example, using a leg extension machine isolates the quadriceps, allowing you to strengthen the muscles in that specific area without involving other muscle groups.
Machines are also great for beginners, as they guide your movement along a fixed path, ensuring proper form and reducing the risk of injury. This makes machines ideal for those recovering from injuries or looking to target specific muscle groups in a controlled and controlled manner.
How to Use Dumbbells and Machines Together
For Overall Strength and Functionality:
Incorporate dumbbells into compound movements (e.g., squats, deadlifts, presses) to build functional strength and engage stabilizer muscles.
For Targeted Muscle Development:
Use machines for isolating specific muscle groups or addressing imbalances (e.g., chest press machine, lat pull-down machine).
For Injury Recovery:
Use machines for safe, controlled movements during the recovery process, and gradually transition to free weights as strength improves.
Benefits of Using Both Dumbbells and Machines
Dumbbells: Activate more muscle fibers, build functional strength, and engage stabilizer muscles.
Machines: Isolate target muscles, reduce the risk of injury, and aid in injury recovery and muscle imbalances.
For optimal results, combining both dumbbells and machines in your routine can give you the best of both worlds: muscle activation from free weights and the ability to isolate muscles for focused development.
Pro Tip: Combine both dumbbells and machines in your routine for balanced muscle growth. For example, use dumbbells for compound lifts like bench presses and machines for isolation exercises like leg extensions.
Supplement Suggestion: A BCAA supplement can help reduce muscle fatigue and improve recovery during mixed workouts.
4. Dumbbells vs Machines: Which Is Better for Beginners?
When you’re just starting out with strength training, the decision between using machines or free weights can be overwhelming. Both types of equipment offer unique benefits, but they cater to different needs and skill levels. Let’s explore which option might be the best for beginners.
The Verdict
Machines: Ideal for Beginners
For those new to strength training, machines are often the better choice. Here’s why:
Controlled Range of Motion: Machines guide your movements along a fixed path, which minimizes the chances of improper form. This makes them a safer option for beginners who may not yet have mastered proper lifting techniques.
Reduced Risk of Injury: The fixed nature of machines helps you avoid the instability that comes with free weights. This lowers the risk of strain or injury, especially when lifting heavy weights for the first time.
Builds Confidence: Since machines provide more support and require less coordination, they can help you build confidence in your strength training abilities. Beginners can learn the basics of exercise form and movement patterns in a controlled environment before advancing to more complex exercises.
Focus on Proper Form: For beginners, machines allow you to focus on isolating specific muscles without the need to worry about stabilizing or balancing the weight. This helps establish a solid foundation of form before transitioning to free weights like dumbbells.
How to Transition from Machines to Free Weights
Start with Machines: Begin with machines to get comfortable with the exercises and learn the right movements. For example, use a leg press machine, chest press machine, or lat pull-down machine to work major muscle groups.
Incorporate Dumbbells Gradually: As you build strength and confidence, gradually introduce dumbbells into your routine. Start with light weights and focus on compound movements like squats, lunges, and presses to activate multiple muscle groups.
Combine Both for a Balanced Routine: Once you’re more comfortable with free weights, a combination of machine exercises and dumbbells will help ensure full-body strength and balanced development.
Benefits of Machines for Beginners
Safer Movements: Machines provide more guidance and reduce the risk of injury.
Easier to Learn Proper Form: Machines help beginners establish correct posture and movement patterns before progressing.
Confidence Boosting: Less coordination is required, which can help beginners feel more comfortable in the gym.
Common Mistakes to Avoid as a Beginner
Skipping Warm-Up and Cool-Down
Never skip your warm-up before starting machine exercises. A good warm-up prepares your muscles and joints for movement, and cooling down helps with recovery.
Using Too Much Weight Too Soon
It’s tempting to lift heavy right away, but focusing on proper form and gradually increasing weight is more important in the long run. Start light and increase the resistance as your confidence and strength grow.
Neglecting Full-Body Exercises
While machines target specific muscles, don’t forget to incorporate compound movements that work multiple muscle groups for balanced development.
Ignoring Progression to Free Weights
Don’t stick to machines forever. As you gain experience, it’s important to challenge your body with free weights to engage stabilizer muscles and improve overall strength.
Pro Tip: Start with machines for the first 4-6 weeks, then gradually incorporate dumbbells into your routine.
Supplement Suggestion: A multivitamin can support overall health and energy levels as you build your fitness foundation.
5. Dumbbells vs Machines: Best Choice for Advanced Lifters?
For advanced lifters, the choice between dumbbells and machines often depends on training goals and the desire to push physical limits. While both types of equipment have their place, the following factors can help determine which one is more beneficial for those at an advanced fitness level.
The Verdict
Dumbbells: Ideal for Advanced Lifters
For advanced lifters, dumbbells are often the better choice. Here’s why:
Greater Range of Motion: Dumbbells allow for a larger range of motion compared to machines, helping to activate more muscle fibers throughout each movement. This range is crucial for maximizing muscle development and functional strength.
Engage More Muscle Fibers: Unlike machines, which guide your movements along a fixed path, dumbbells require you to stabilize the weight through multiple planes of motion. This engages not only the target muscles but also smaller stabilizer muscles, leading to a more comprehensive and effective workout.
Versatility for Complex Movements: Dumbbells allow for greater versatility in exercise selection. From compound lifts like bench presses and squats to unilateral exercises like lunges or dumbbell snatches, the variety of movements you can perform with dumbbells supports progress in strength, power, and hypertrophy.
Progressive Overload: Advanced lifters need to progressively overload their muscles to continue making gains. Dumbbells are ideal for this, as they offer more granular increments in weight compared to most machines, allowing for more controlled and consistent progression.
How to Maximize Your Dumbbell Workouts
Focus on Compound Movements: Incorporate exercises like dumbbell squats, deadlifts, presses, and rows to engage multiple muscle groups and build strength.
Use Unilateral Exercises: Implement one-sided movements like single-arm dumbbell presses or lunges to address imbalances and target muscles individually.
Progressive Overload: Gradually increase the weight or reps with dumbbells over time to continue challenging your muscles and making progress.
Benefits of Dumbbells for Advanced Lifters
Larger Range of Motion: Maximizes muscle activation by allowing more movement flexibility.
Engages More Muscle Fibers: Works stabilizers and target muscles for better muscle development and functional strength.
Versatility: Suitable for a wide range of exercises, from strength training to explosive movements.
Supports Progressive Overload: Offers more precise weight increments to help you steadily increase intensity and challenge your muscles.
Common Mistakes to Avoid for Advanced Lifters
Using Too Heavy a Weight Too Soon
While it’s important to challenge yourself, always ensure you maintain proper form. Lifting too heavy without control can lead to injury.
Neglecting Warm-Up and Cool-Down
Never skip your warm-up before heavy lifting. A dynamic warm-up prepares your muscles for the intensity of the workout and reduces the risk of injury.
Not Incorporating Variety
Don’t rely solely on one type of exercise or equipment. Mixing dumbbells with machines or bodyweight exercises can prevent plateaus and keep your workouts balanced.
Forgetting Rest and Recovery
Overtraining without proper recovery can hinder progress. Be sure to give your muscles time to recover and adapt to your advanced workouts.
Pro Tip: Use machines to target weak points or add variety to your routine, but focus on dumbbells for compound lifts.
Supplement Suggestion: A pre-workout supplement can give you the energy and focus you need for intense dumbbell workouts.
6. The Best of Both Worlds: Combining Dumbbells and Machines
Maximizing muscle growth and achieving your fitness goals doesn’t have to be about choosing between dumbbells or machines. In fact, Combining both in your routine can provide a comprehensive workout that targets all aspects of strength training. Many athletes also mix free weights with kettlebell vs barbell training to improve power, endurance, and full-body muscle development. By using each for its unique benefits, you can develop functional strength while also isolating muscles for focused growth.
As detailed in Healthline’s comprehensive analysis of free weights vs. machines, free weights like dumbbells activate more stabilizer muscles and enhance functional strength, while machines provide controlled, isolated movements that are perfect for beginners and targeted training.
Why It Works
Dumbbells for Compound Movements
Dumbbells are excellent for compound exercises because they engage multiple muscle groups at once. Movements like squats, deadlifts, and presses recruit a variety of muscles, helping to improve overall strength and muscle coordination. These exercises require stabilizer muscles to maintain balance and control, leading to greater functional strength that carries over into real-life activities.
Machines for Isolation Exercises
On the other hand, machines are designed to isolate specific muscle groups, allowing you to target weak points and improve muscle imbalances. By isolating muscles with machines, you can focus on building mass in specific areas, such as the chest, back, or legs. Machines are especially beneficial for beginners or those recovering from injury because they guide the movement and ensure proper form.
Sample Routine
A balanced workout routine that combines both dumbbells and machines ensures you get the best of both worlds. Here’s a sample routine:
Maximize Muscle Activation: Dumbbells engage multiple muscle groups while machines help target specific muscles for more balanced growth.
Efficient and Effective: Combining compound movements with isolation exercises allows you to work all major muscle groups in a single workout, optimizing your time in the gym.
Prevent Plateaus: Using a mix of both types of equipment ensures you constantly challenge your muscles in different ways, helping to avoid plateaus in progress.
Target Weak Points: Machines are great for addressing muscle imbalances or weak points that may not be as effectively targeted with compound movements alone.
Common Mistakes to Avoid
Relying Too Much on Machines
While machines are useful for isolating muscles, don’t neglect compound movements with dumbbells, as these are crucial for overall strength and muscle coordination.
Not Varying Your Routine
Don’t stick to the same exercises week after week. Varying your exercises and equipment keeps your muscles challenged and promotes consistent progress.
Overlooking Full-Body Workouts
Be sure to include both upper and lower body exercises in your routine. A well-rounded workout will improve muscle balance and overall performance.
Pro Tip: Alternate between dumbbells and machines each week to keep your workouts fresh and challenging.
Supplement Suggestion: A post-workout recovery supplement can help your muscles recover faster after mixed workouts.
Product Recommendations
Here are some of my top picks to help you maximize muscle growth:
Adjustable Dumbbells: Perfect for space-saving strength training.
Leg Press Machine: Great for building lower body strength.
Protein Powder: Supports muscle recovery and growth.
Creatine Supplement: Enhances muscle strength and performance.
Pre-Workout Supplement: Boosts energy and focus for intense workouts.
FAQ
1. Which promotes better muscle growth: dumbbells or machines?
Both tools can drive hypertrophy. A 2023 meta-analysis reports similar muscle mass gains from both free weights and machines when training to failure. The key is consistency and progressive overload.
2. Are dumbbells safer than machines?
Machines offer more guidance and stability, lowering the risk of injury especially for beginners. But with proper form, dumbbells can be just as safe and are more versatile.
3. Can advanced lifters rely on machines?
Absolutely but the best approach mixes both. Healthline advises combining free weights and machines to balance functional strength and muscle isolation. Advanced athletes benefit from dumbbells’ greater range of motion while using machines to focus on weak spots.
4. Do dumbbells activate more muscles than machines?
Yes. Free weights require stabilizer muscles core, shoulders, wrists to control movement. Machines, while excellent for isolation, don’t engage these supporting muscles to the same extent.
5. What’s the best starting point for beginners?
Start with machines to learn proper movement patterns, then transition into dumbbells for more functional strength. This progression follows both practical and expert advice
Conclusion
Both dumbbells and machines have their place in a muscle-building routine. Dumbbells are better for functional strength and compound movements, while machines are ideal for isolation exercises and controlled movements. By combining both, you can achieve balanced muscle growth and maximize your results. Remember, consistency and proper form are key choose the tools that work best for your goals and fitness level!
Disclaimer
Some of the links in this post are affiliate links, which means I may earn a small commission if you purchase through them. This comes at no extra cost to you and helps support the creation of free, valuable content like this. Thank you for your support!